Managing Members
The People tab in the Manage section is where you manage all family members — approved members, pending requests, and their individual settings.
View Family Members
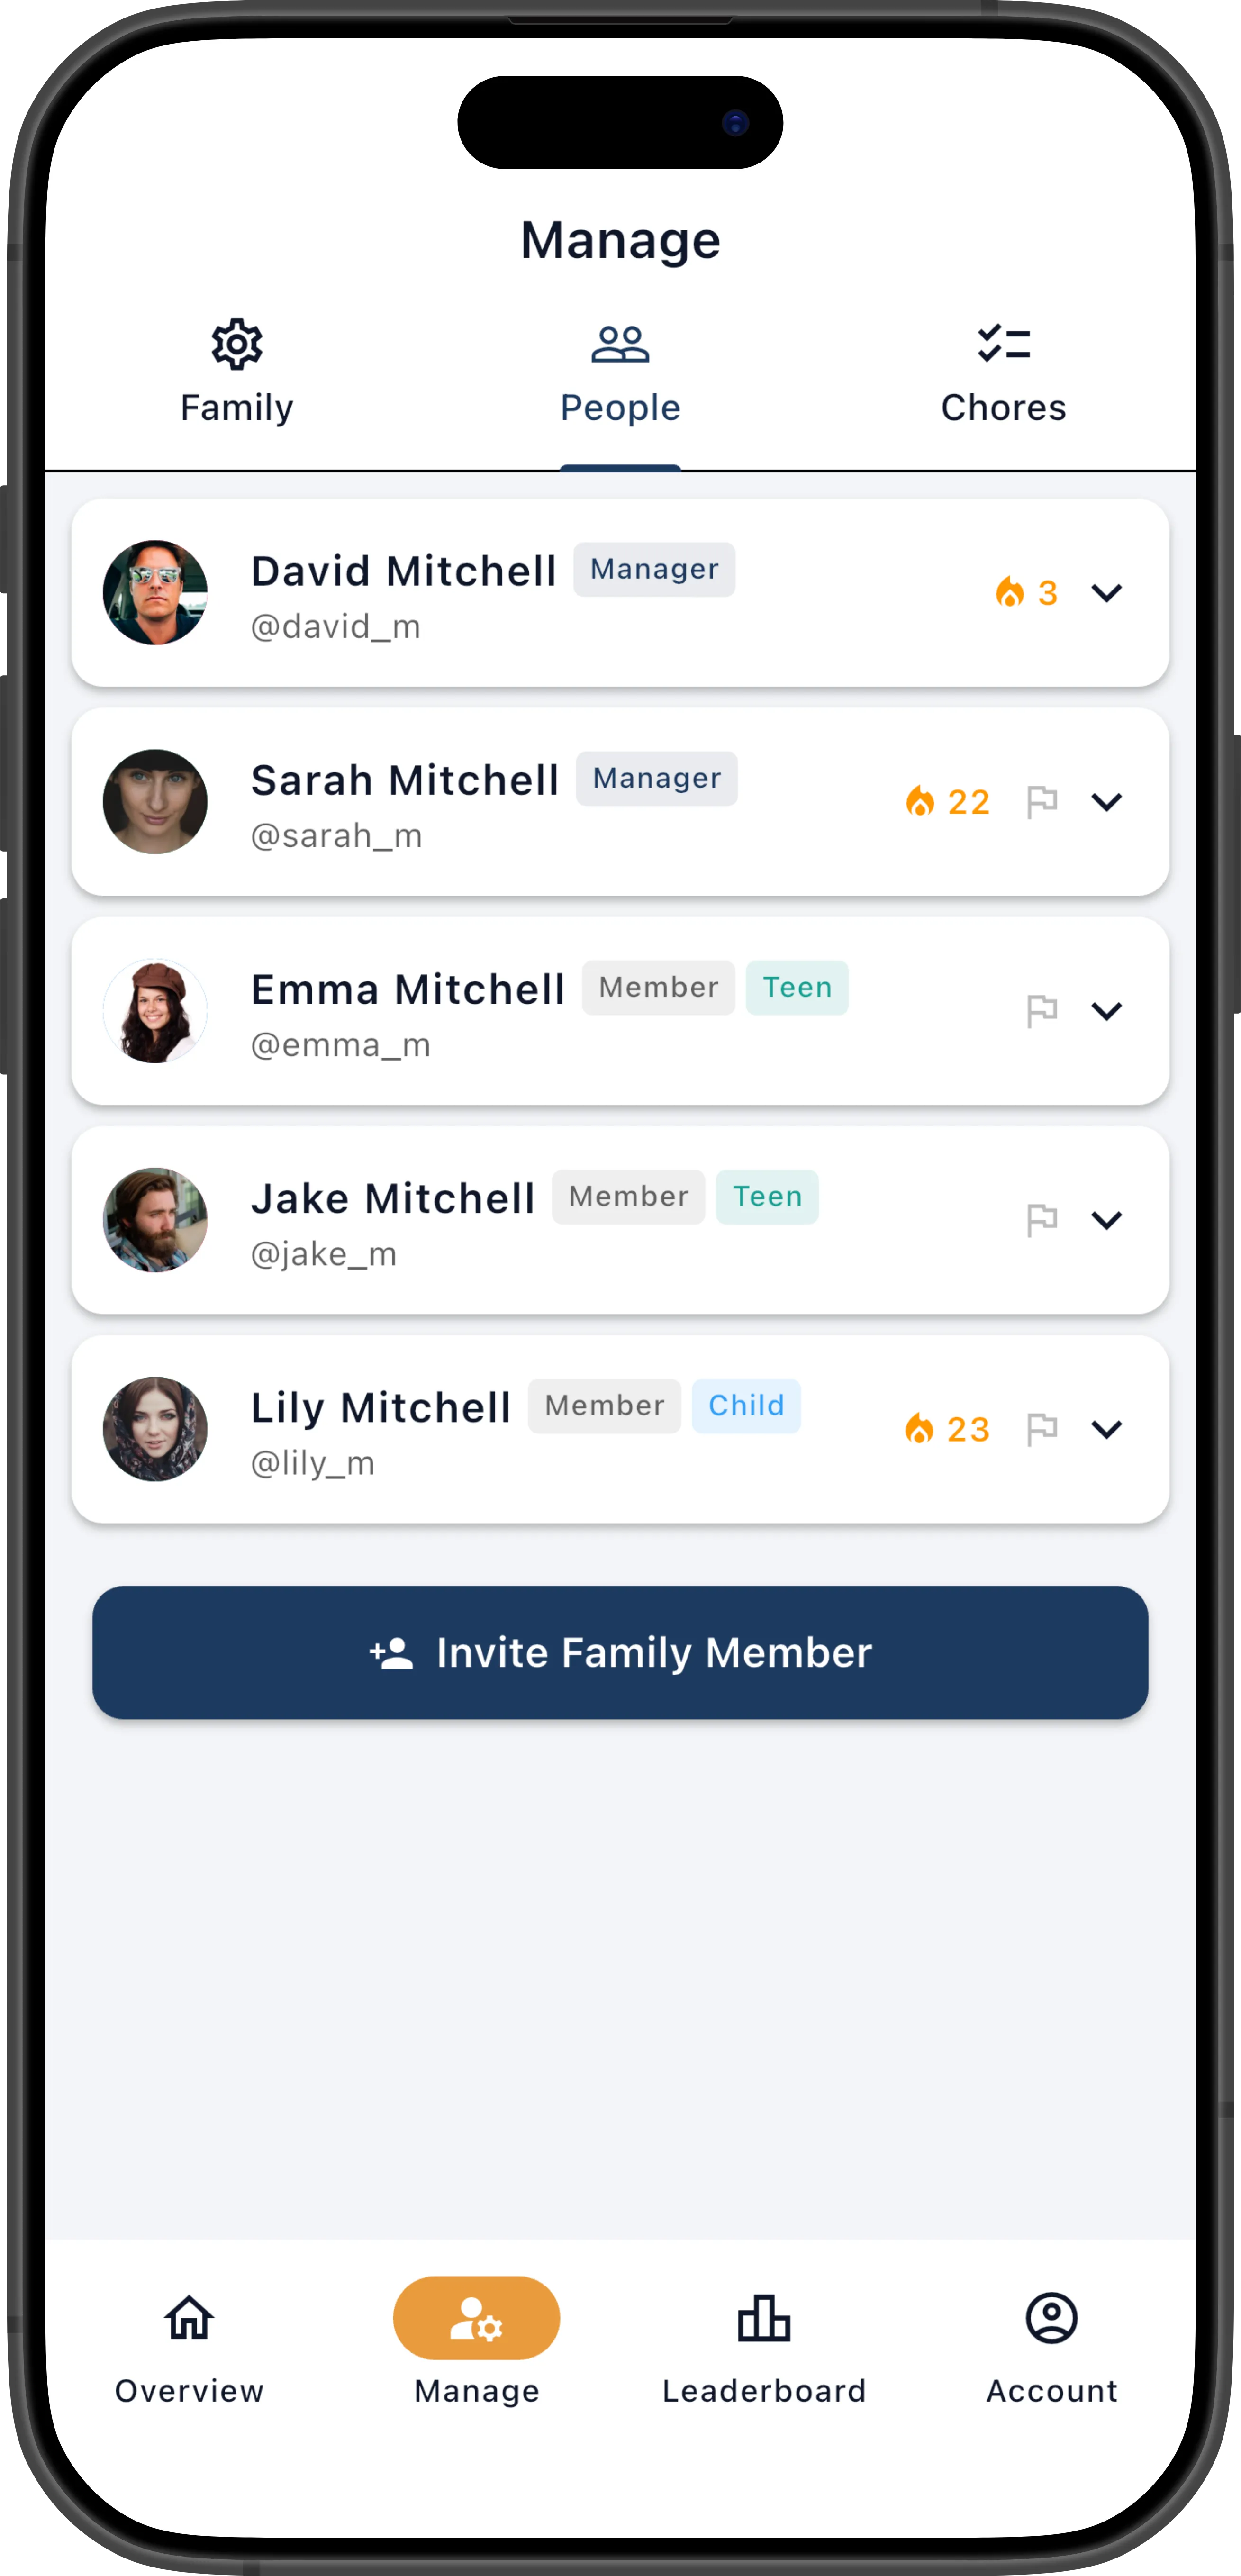
Section titled “View Family Members”Navigate to Manage → People. You’ll see:
- Approved members — Active family members with their role (Manager or Member).
- Pending members — People who have joined with an invite code but haven’t been approved yet. See Approvals.
Each member row shows their avatar, display name (with username below), a role badge (Manager or Member), and age group badges for minors (Child or Teen). Members with an active streak show a streak counter next to their name. A report icon lets you quickly view that member’s stats.
The Member Card
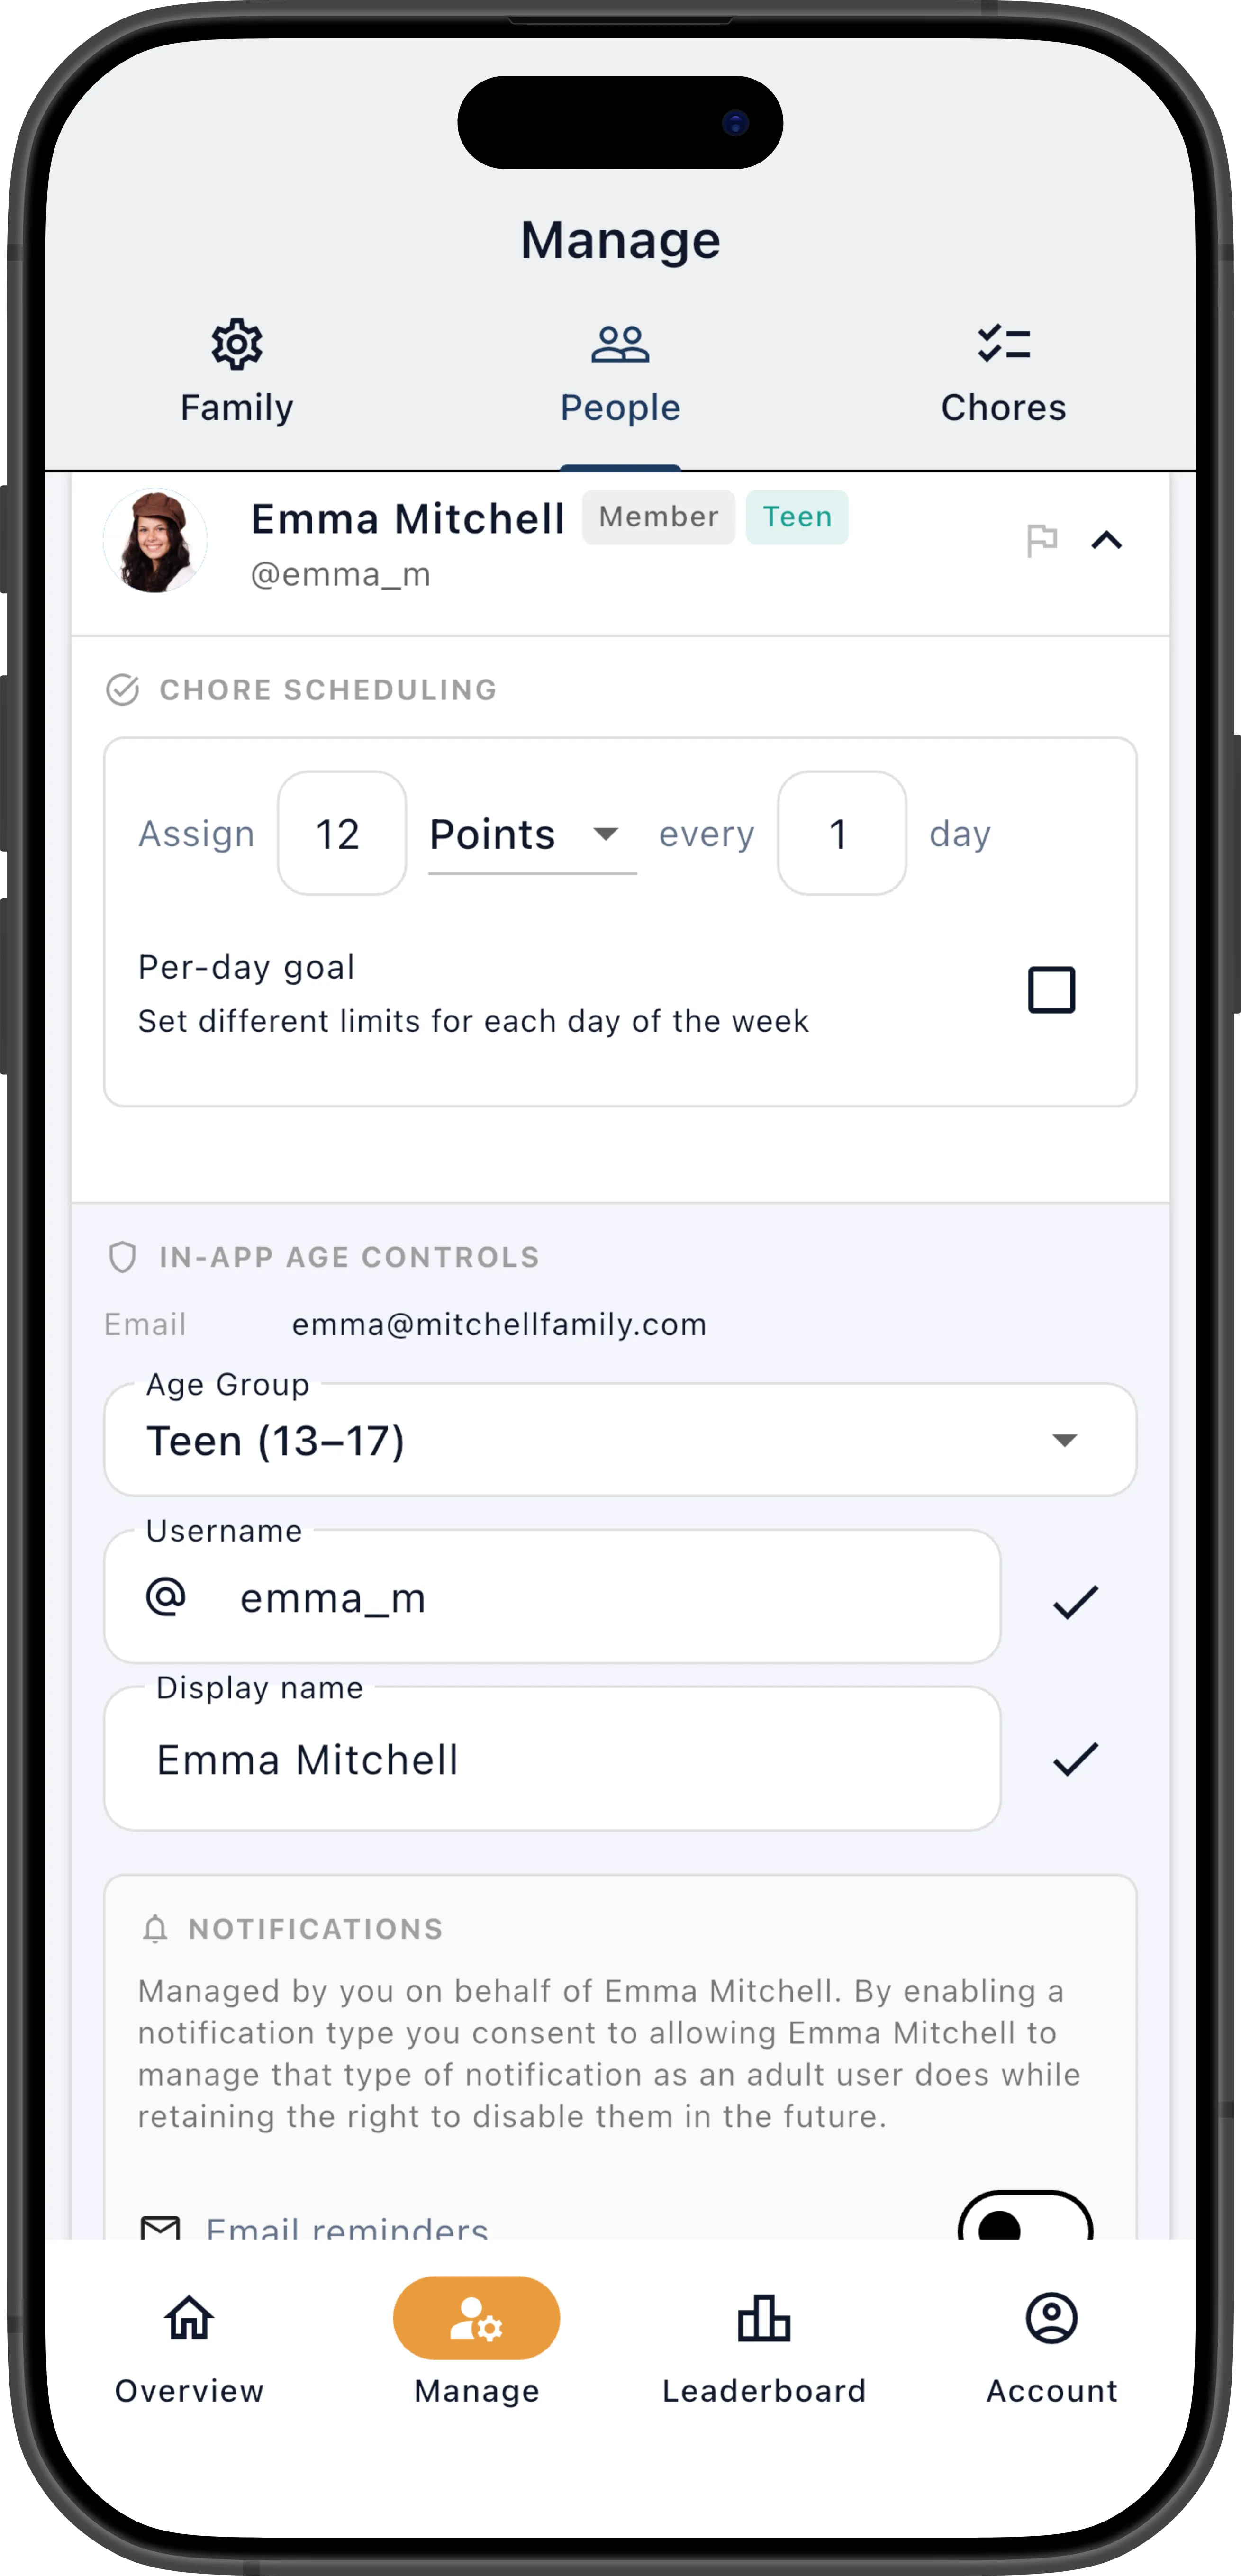
Section titled “The Member Card”Tap any member’s row to expand it into a detailed management card. The card is organized into sections that group related settings:
- Chore Scheduling — Goal type, goal value, interval, and per-day goal configuration
- Age Group — View or change the member’s age group, with parental consent controls
- Notifications — Manager-controlled notification permissions (for minor accounts)
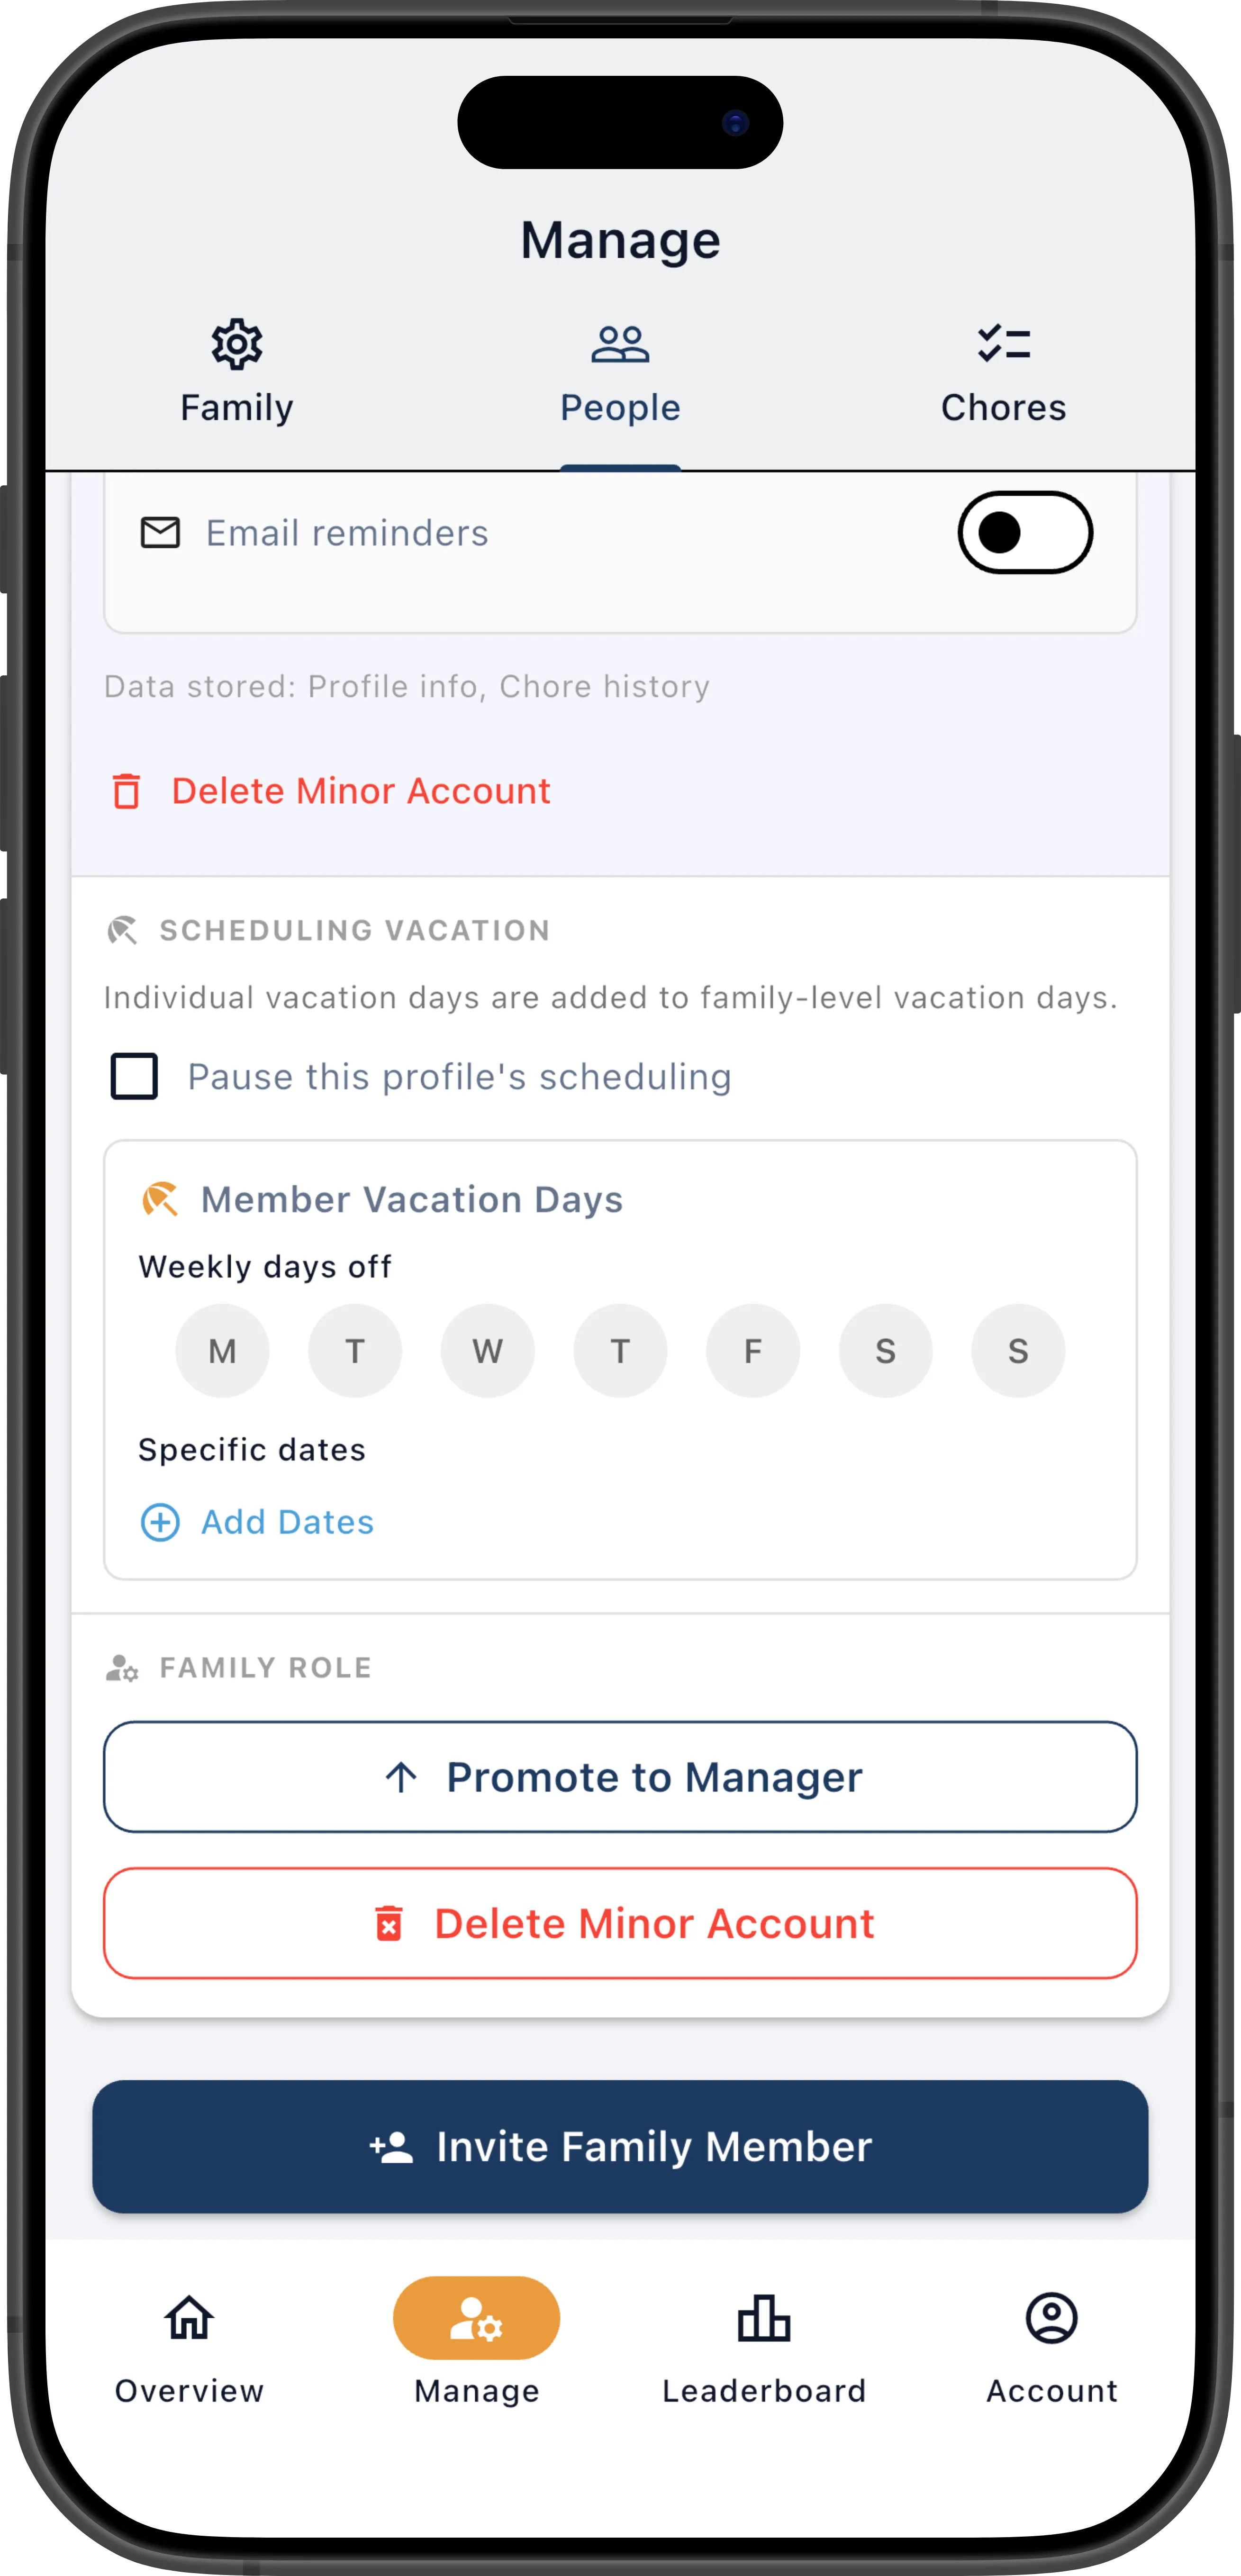
- Vacation — Pause scheduling toggle, vacation days of the week, and specific vacation dates
- Family Role — Promote to manager or remove from family
Each section expands independently so you can focus on just the settings you need to change. Changes to most fields are saved when you tap the checkmark next to that field.
Set a Member’s Goal
Section titled “Set a Member’s Goal”Goals give members a target to work toward each day or week. You can set goals based on effort points or number of chores.
- On the People tab, expand a member’s row and open the Chore Scheduling section.
- Set the Goal Type: Points or Chores.
- Enter the Goal Value — the target to reach (e.g., 10 points or 3 chores).
- Set the Interval — how many days the goal covers (e.g.,
1= daily,7= weekly). - Tap the checkmark to save.
Points goals work best when your chores have varied difficulty — a member might complete two hard chores (8 pts each) or four easy ones (4 pts each) and reach the same target. Chores goals work best when your chores are roughly equal in effort and you just want a certain number done each day.
Goals affect how the scheduler assigns chores and whether a member can self-assign more. A member at or above their goal limit won’t receive additional automatic assignments and will see fewer chores in their self-assign list. See Goals & Points for a deeper explanation.
Quick Assign
Section titled “Quick Assign”From the manager dashboard, you can quickly assign chores to a member up to a target amount — ChorifIQ automatically selects the best available chores.
- On the Today’s Chores dashboard, tap a member’s name.
- A bottom sheet opens showing:
- The member’s current goal progress (e.g., “4/10 points today”)
- An Assign additional section with a points/chores toggle and a target field
- A list of eligible chores you can assign individually
- Choose Points or Chores mode, enter a target value, and tap Assign.
- ChorifIQ assigns available chores that total up to (but don’t exceed) the target.
The system respects eligibility restrictions, goal limits, and the Allow Multiple Assignments setting. If no chores match the target, you’ll see “No chores matched the target.”
You can also assign individual chores from the same sheet by tapping a chore in the list.
Pause a Member’s Schedule
Section titled “Pause a Member’s Schedule”Pausing a member stops all new chore assignments from being created for them. Unlike vacation days (which skip specific days while the member otherwise stays on schedule), pausing removes the member from scheduling entirely — they won’t appear in rotations, won’t receive automatic assignments, and won’t be offered chores for self-assign.
- Expand the member’s row on the People tab and open the Vacation section.
- Toggle Pause Scheduling on.
This is useful for extended absences — a member traveling for two weeks, staying at the other parent’s house, or taking a break from chores for any reason. Turn it off when they return to resume normal scheduling. Existing pending assignments are not affected by the pause; only new ones are prevented.
Set Vacation Days
Section titled “Set Vacation Days”For regular recurring days off (e.g., weekends), set vacation days of the week for an individual member so they’re skipped in the rotation on those days.
- Expand the member’s row and open the Vacation section.
- Under Vacation Days of Week, select the recurring days (e.g., Saturday and Sunday).
- Under Vacation Dates, add any specific dates they’ll be unavailable (e.g., spring break). (Pro+ required)
Individual vacation settings layer on top of the family-wide vacation days — if the family already has Sundays off and you add Saturday for one member, that member gets both days off while others only get Sunday. Vacation days don’t break a member’s streak; those days are simply excluded from the streak calculation.
For family-wide vacation settings, see Vacation.
Edit a Member’s Profile
Section titled “Edit a Member’s Profile”Managers can edit a member’s profile details directly from the People tab without needing the member present.
- Expand the member’s row.
- Edit any of the following fields:
- Display name — The name shown on the dashboard, leaderboard, and notifications.
- Username — The member’s unique identifier. Must be unique across all ChorifIQ users.
- Avatar — Tap the member’s avatar to upload a new profile photo.
- Phone number — Used for SMS notifications (Max tier only, adults only).
- Tap the checkmark next to each field to save.
Members can also edit their own profile from their Account screen. See Your Profile.
Remove an Adult Member
Section titled “Remove an Adult Member”- Expand the member’s row on the People tab.
- Scroll to the bottom of the expanded card and tap Remove from Family.

- A confirmation dialog appears. Tap Remove to confirm.
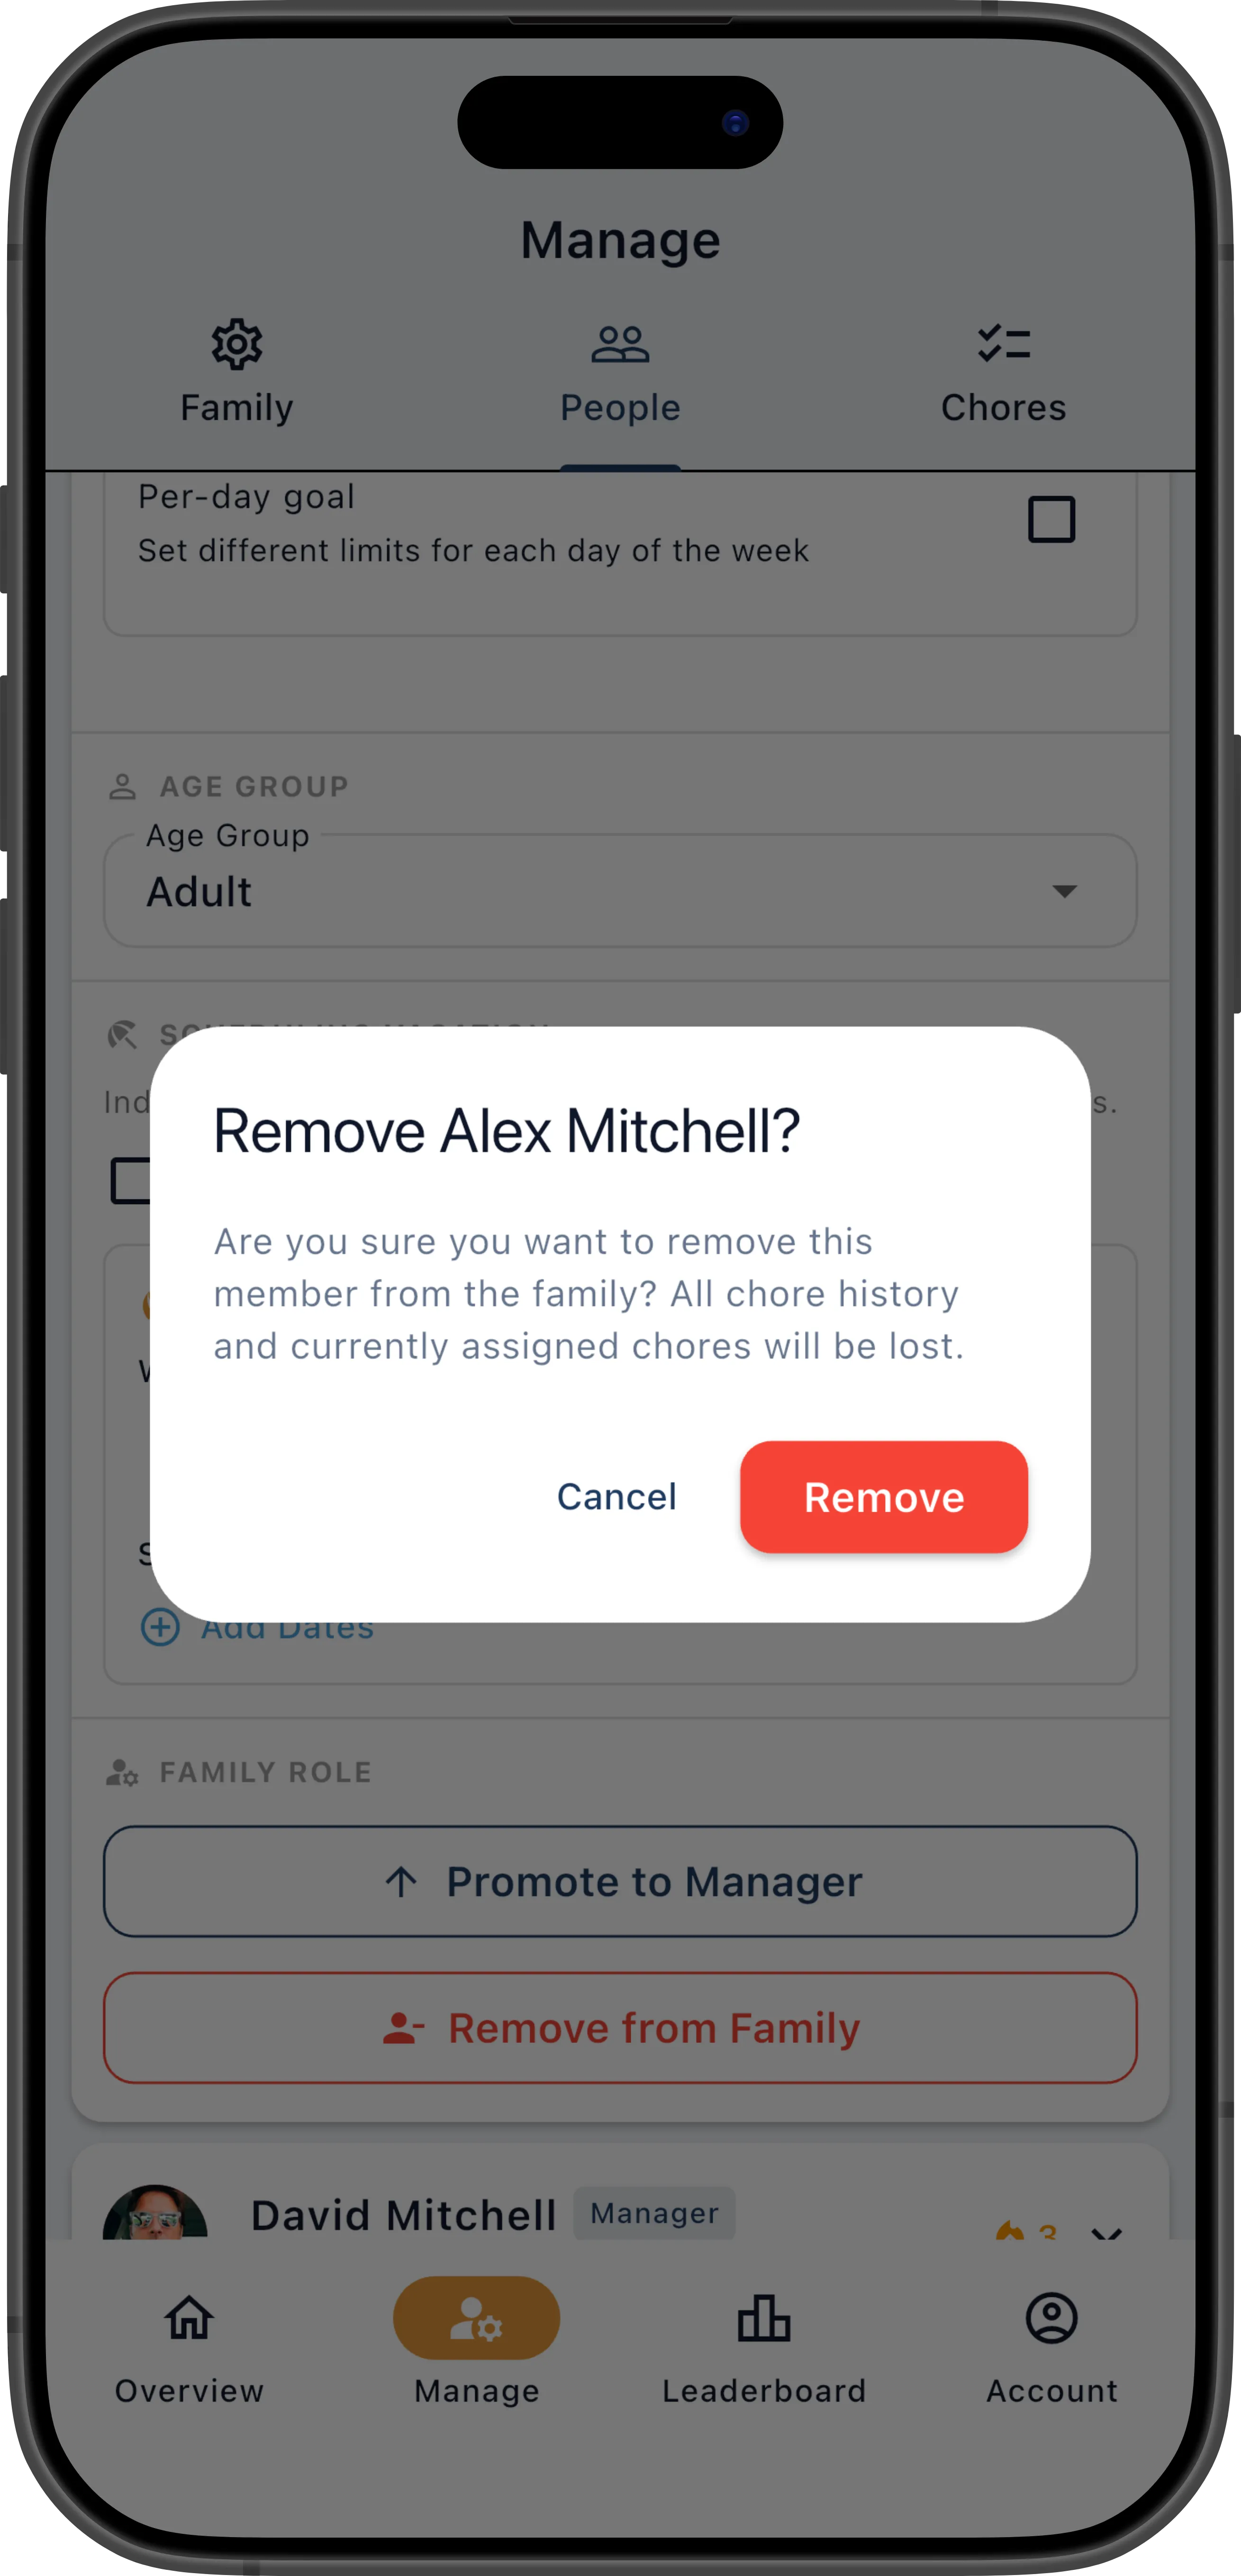
The member is removed from the family and all their chore assignments are cleared. Their account is not deleted — they can join another family with a new invite code.
Members can also remove themselves from the family through their own account settings. The effect is the same.
Delete a Minor’s Account
Section titled “Delete a Minor’s Account”Minor accounts (teens and children) are tied to the family they were invited to and cannot be transferred to another family. Because of this, removing a minor from the family permanently deletes their account.
- Expand the minor’s row on the People tab.
- Scroll to the bottom of the expanded card and tap Delete Minor Account.
- A confirmation dialog explains that the account will be permanently deleted, all chore history will be removed, and parental consent will be revoked. Tap Delete Account to confirm.
Changing a Member’s Age Group
Section titled “Changing a Member’s Age Group”If a member’s age group was set incorrectly at signup (for example, because the platform Age Signals estimate was wrong), or if you as a parent want to explicitly consent to your child or teen being treated as a different age group, you can correct it from the People tab.
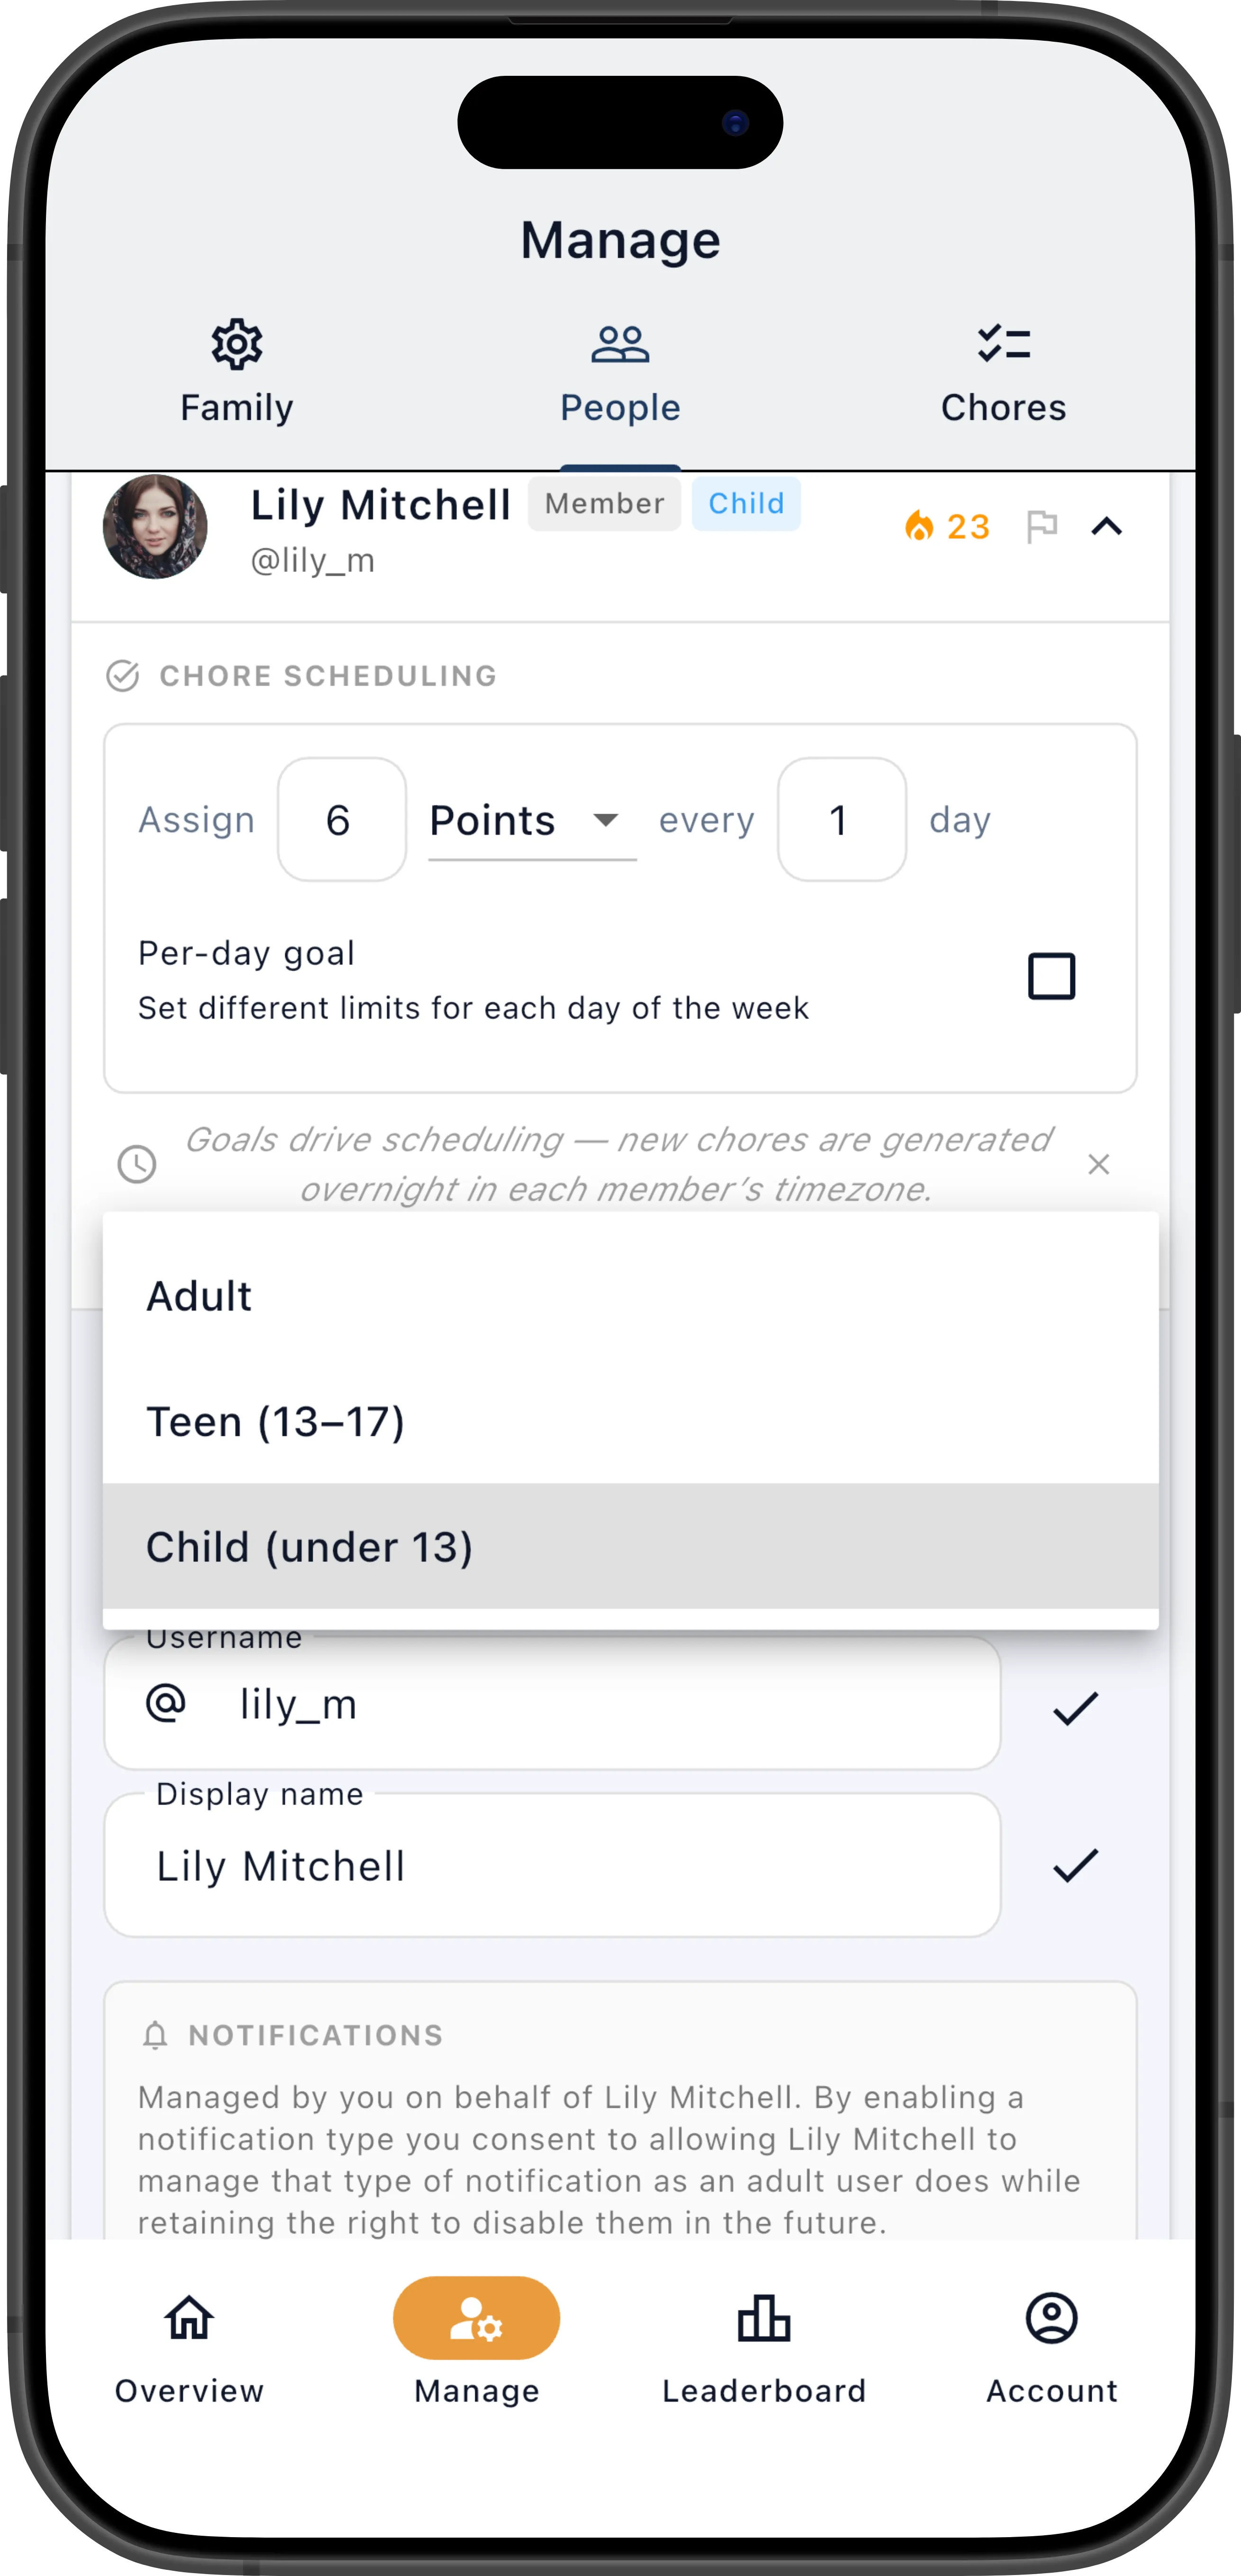
- Expand the member’s row on the People tab.
- Tap Change Age Group.
- Select the correct age group (Adult, Teen, or Child).
- Confirm the change.
For full details on how age groups affect features and notifications, see Minor Accounts.
Promoting a Member to Manager
Section titled “Promoting a Member to Manager”To give another member manager-level access:
- Expand the member’s row.
- Tap Promote to Manager.
- Confirm.
The number of managers your family can have depends on your subscription tier:
| Tier | Max Managers |
|---|---|
| Free | 1 |
| Pro | 2 |
| Max | 4 |
If your tier has room for another manager, promoting a member adds them as an additional manager — both of you keep manager access.
If your tier is already at its manager limit, promoting a member swaps roles: the member you promote becomes a manager and replaces you. Make sure this is intentional.