Adding Family Members
Once your family is set up, invite your household members to join. ChorifIQ has two separate invitation flows — one for adults, and one for minors (teens and children).
The number of members your family can have depends on your subscription tier:
| Tier | Members | Managers | Total |
|---|---|---|---|
| Free | 3 | 1 | 4 |
| Pro | 4 | 2 | 6 |
| Max | 8 | 4 | 12 |
If your family is at its member limit, you’ll need to upgrade before inviting more people. See Billing for plan details.
Invite an Adult
Section titled “Invite an Adult”Adults can join a family on their own using an invite code.
- From the main navigation, go to Manage, then tap the invite icon (top right).
- In the Add Adult tab, you’ll see your family’s invite code and a QR code.
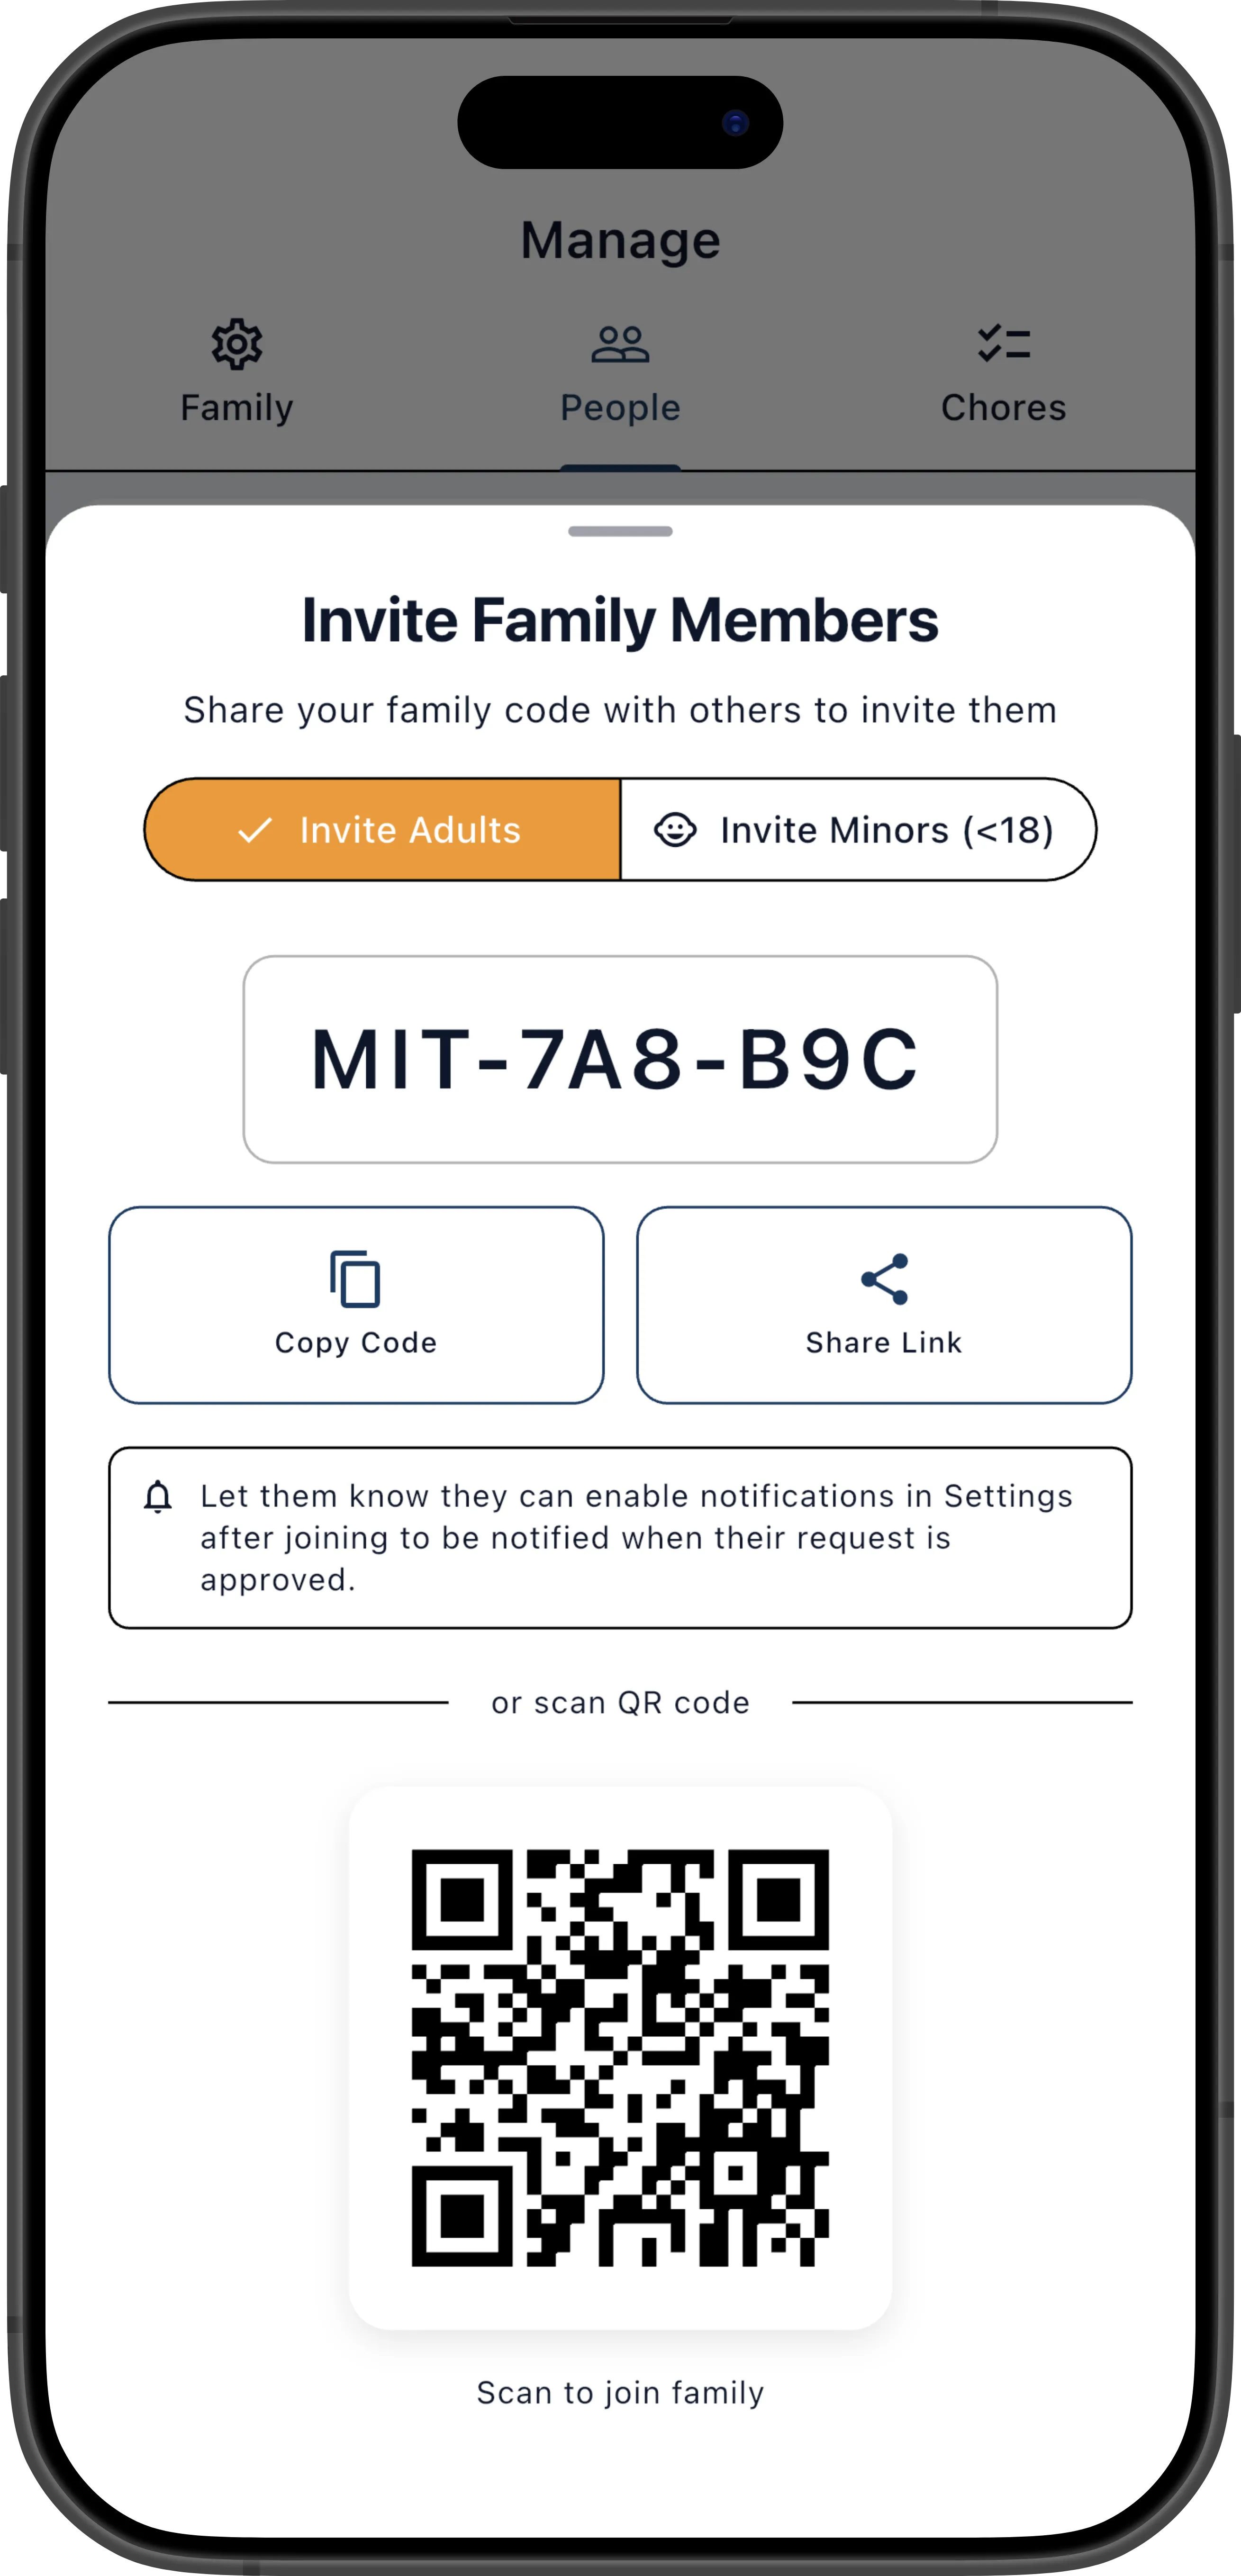
- Share the invite code or QR code with the person you want to invite:
- Tap Copy to copy the code to the clipboard and paste it into a text message or email.
- Tap Share Code to send it via Messages, email, or any other sharing app.
- Tap Share QR to share the QR code as an image — useful if the person is nearby and can scan it directly.
- The person creates their own ChorifIQ account and enters the code when prompted on the Complete Your Profile screen.
- Their request appears in your Pending Members list for approval. You’ll receive a push notification if you have Family join requests enabled in your notification settings. See Approving New Members.
Invite a Minor (Teen or Child)
Section titled “Invite a Minor (Teen or Child)”Minors — both teens and children under 13 — cannot create or join a family on their own. They must be invited by a parent. To comply with COPPA, the invitation uses a two-step email confirmation flow to obtain verifiable parental consent before the child’s account is created or any data is collected.
Here’s how it works:
- From the invite screen, tap the Invite Minor tab.
- Enter the minor’s email address.
- Select the minor’s age group from the dropdown: Teen (13–17) or Child (under 13). This determines what privacy protections and feature restrictions apply to the account — see Minor Accounts for details. The age group you select here is applied automatically when the minor creates their account, so they skip the age verification screen entirely.
- Check the parental consent checkbox to acknowledge the data collection notice.
- Tap Send Invite.
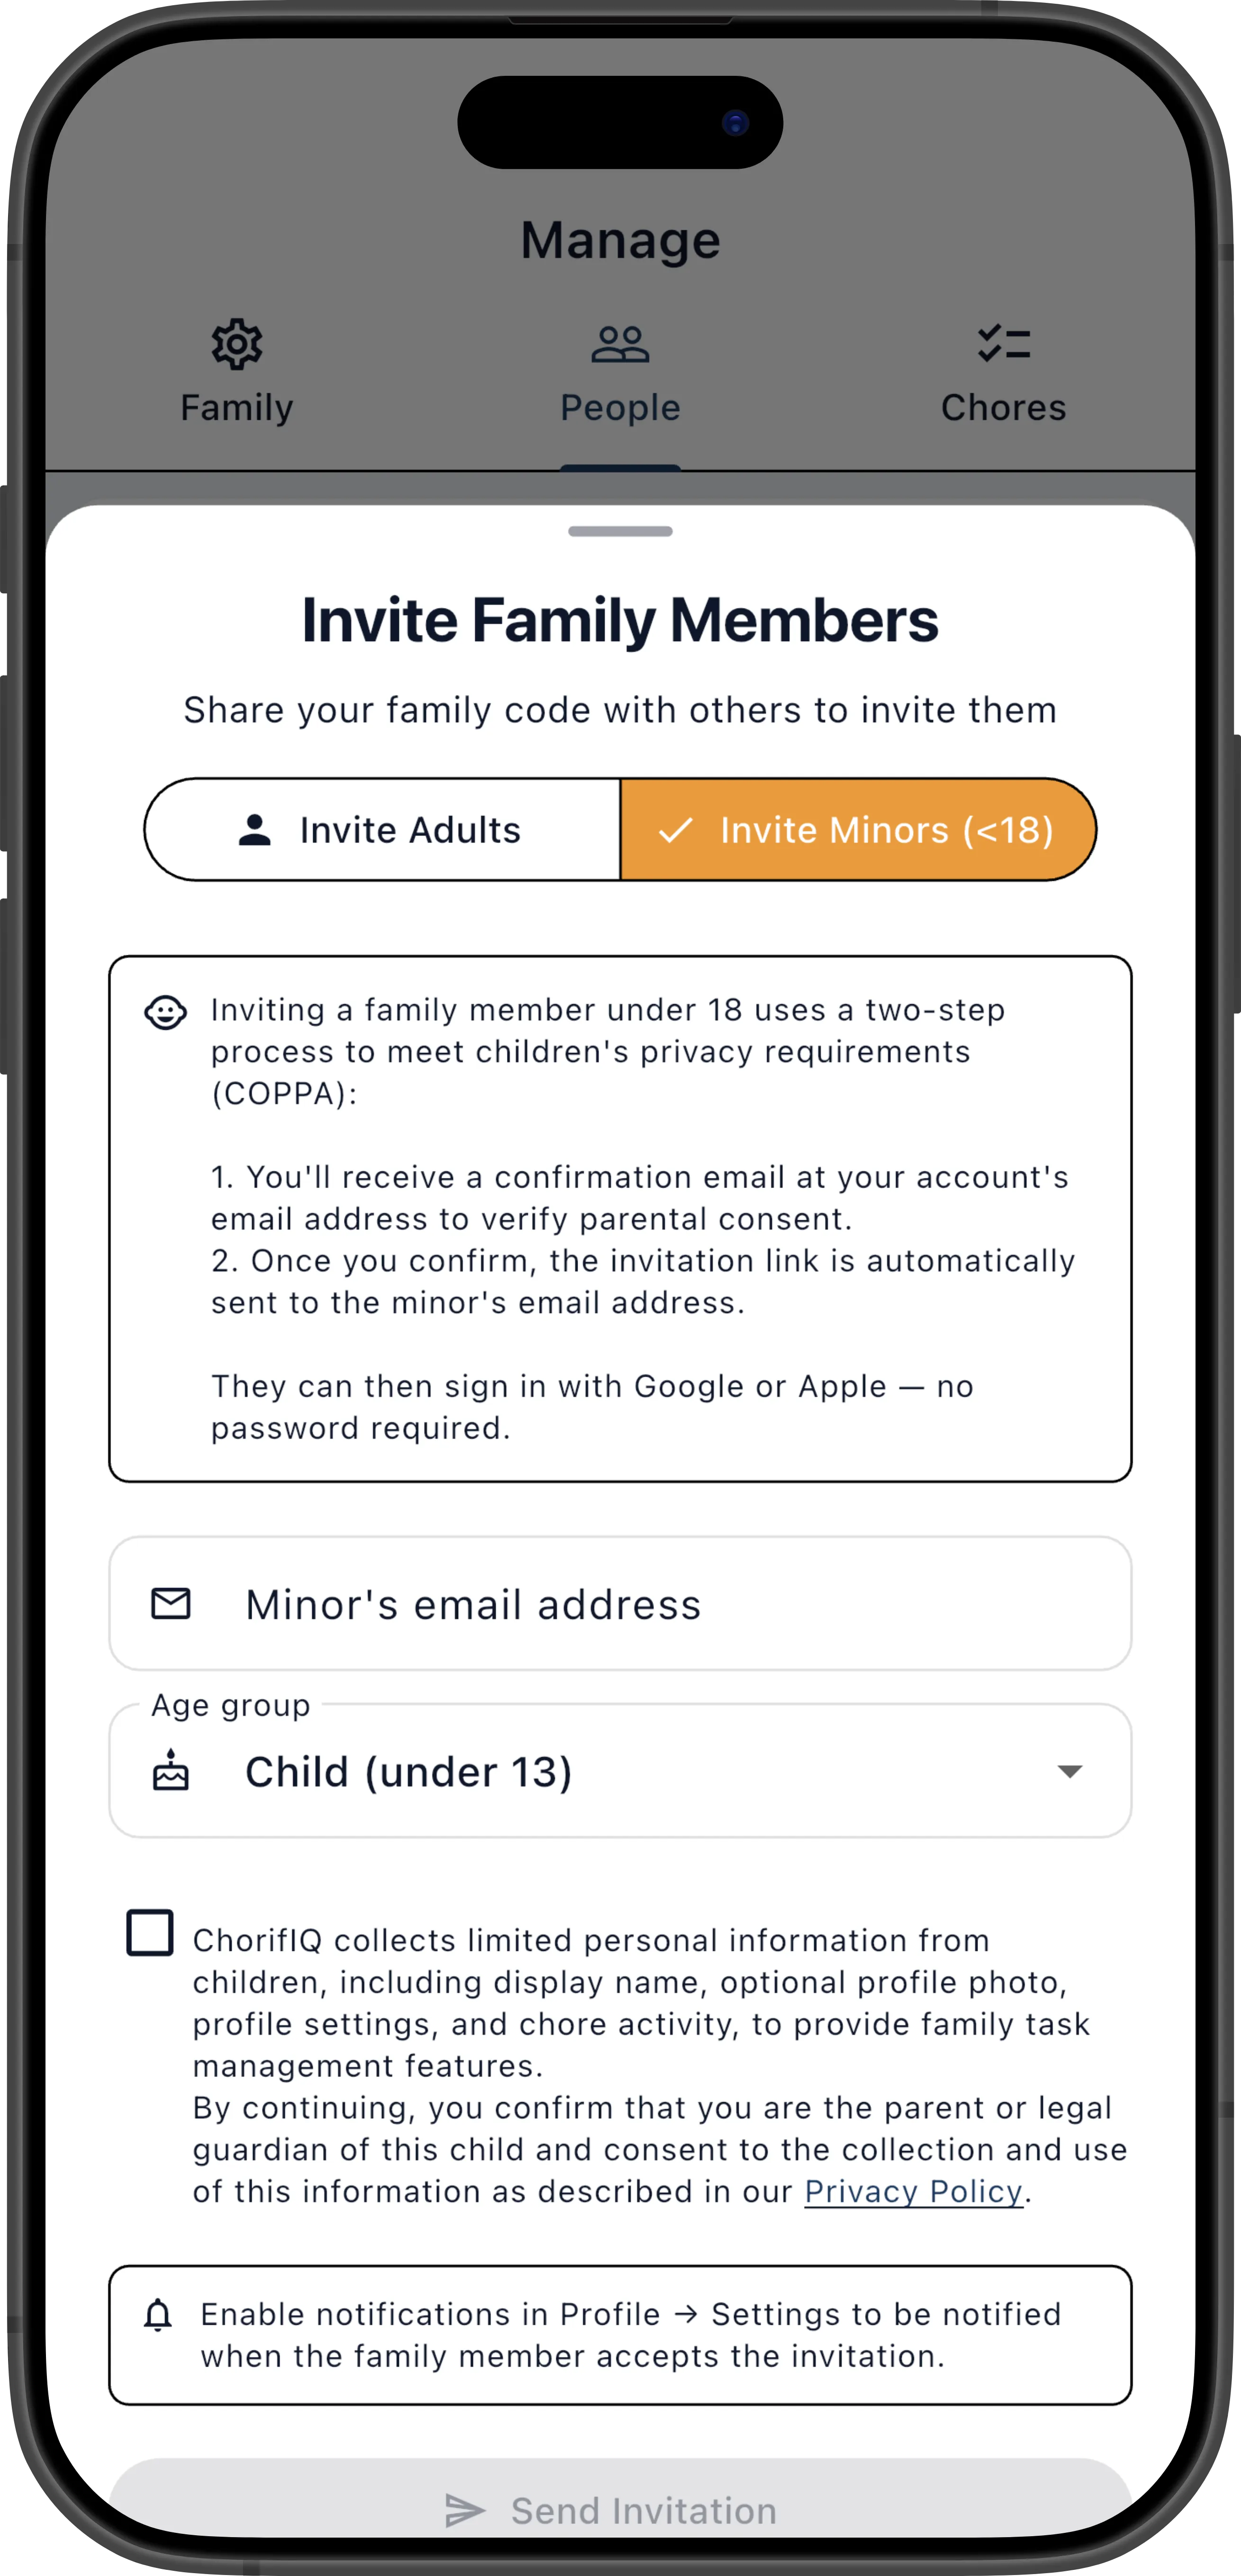
After tapping Send Invite, you’ll see a green “Email confirmation sent” message under the button. The button stays greyed out until you change the email field — this prevents accidental duplicate invites. A Resend confirmation email link also appears if the email didn’t arrive.
Step 1 — You receive a confirmation email (as the parent):
An email is sent to your account’s email address (not the minor’s). It includes a summary of what data ChorifIQ will collect and a Confirm Parental Consent button. This link is valid for 72 hours.
Step 2 — You click the confirmation link:
Clicking the button in the email opens a web page where you review the data collection notice one more time and confirm consent. Your consent is recorded as a verifiable parental consent action as required by COPPA.
Step 3 — The minor receives their invitation:
Once you confirm, the minor’s invitation email is automatically sent to their address. When they tap the link, they’re guided through creating an account with the invite code pre-filled — they can only join your family.
Once account creation is complete, the minor’s account appears in your Pending Members list for approval.
Locking Down After Everyone Has Joined
Section titled “Locking Down After Everyone Has Joined”Once all your family members are in, consider disabling new join requests so nobody can apply using an old code or link:
- Go to Manage → Family Settings.
- Toggle Allow family join requests off.
The invite code is permanently removed. If you ever need to add someone new, just turn the setting back on — a fresh code is generated automatically. See Allow Family Join Requests for full details.