Managing Chores
Chores in ChorifIQ have two parts: Definitions (the chore template and schedule) and Assignments (the individual chore assignments generated from a definition). The Chores screen lets you manage both.
The Chores Screen
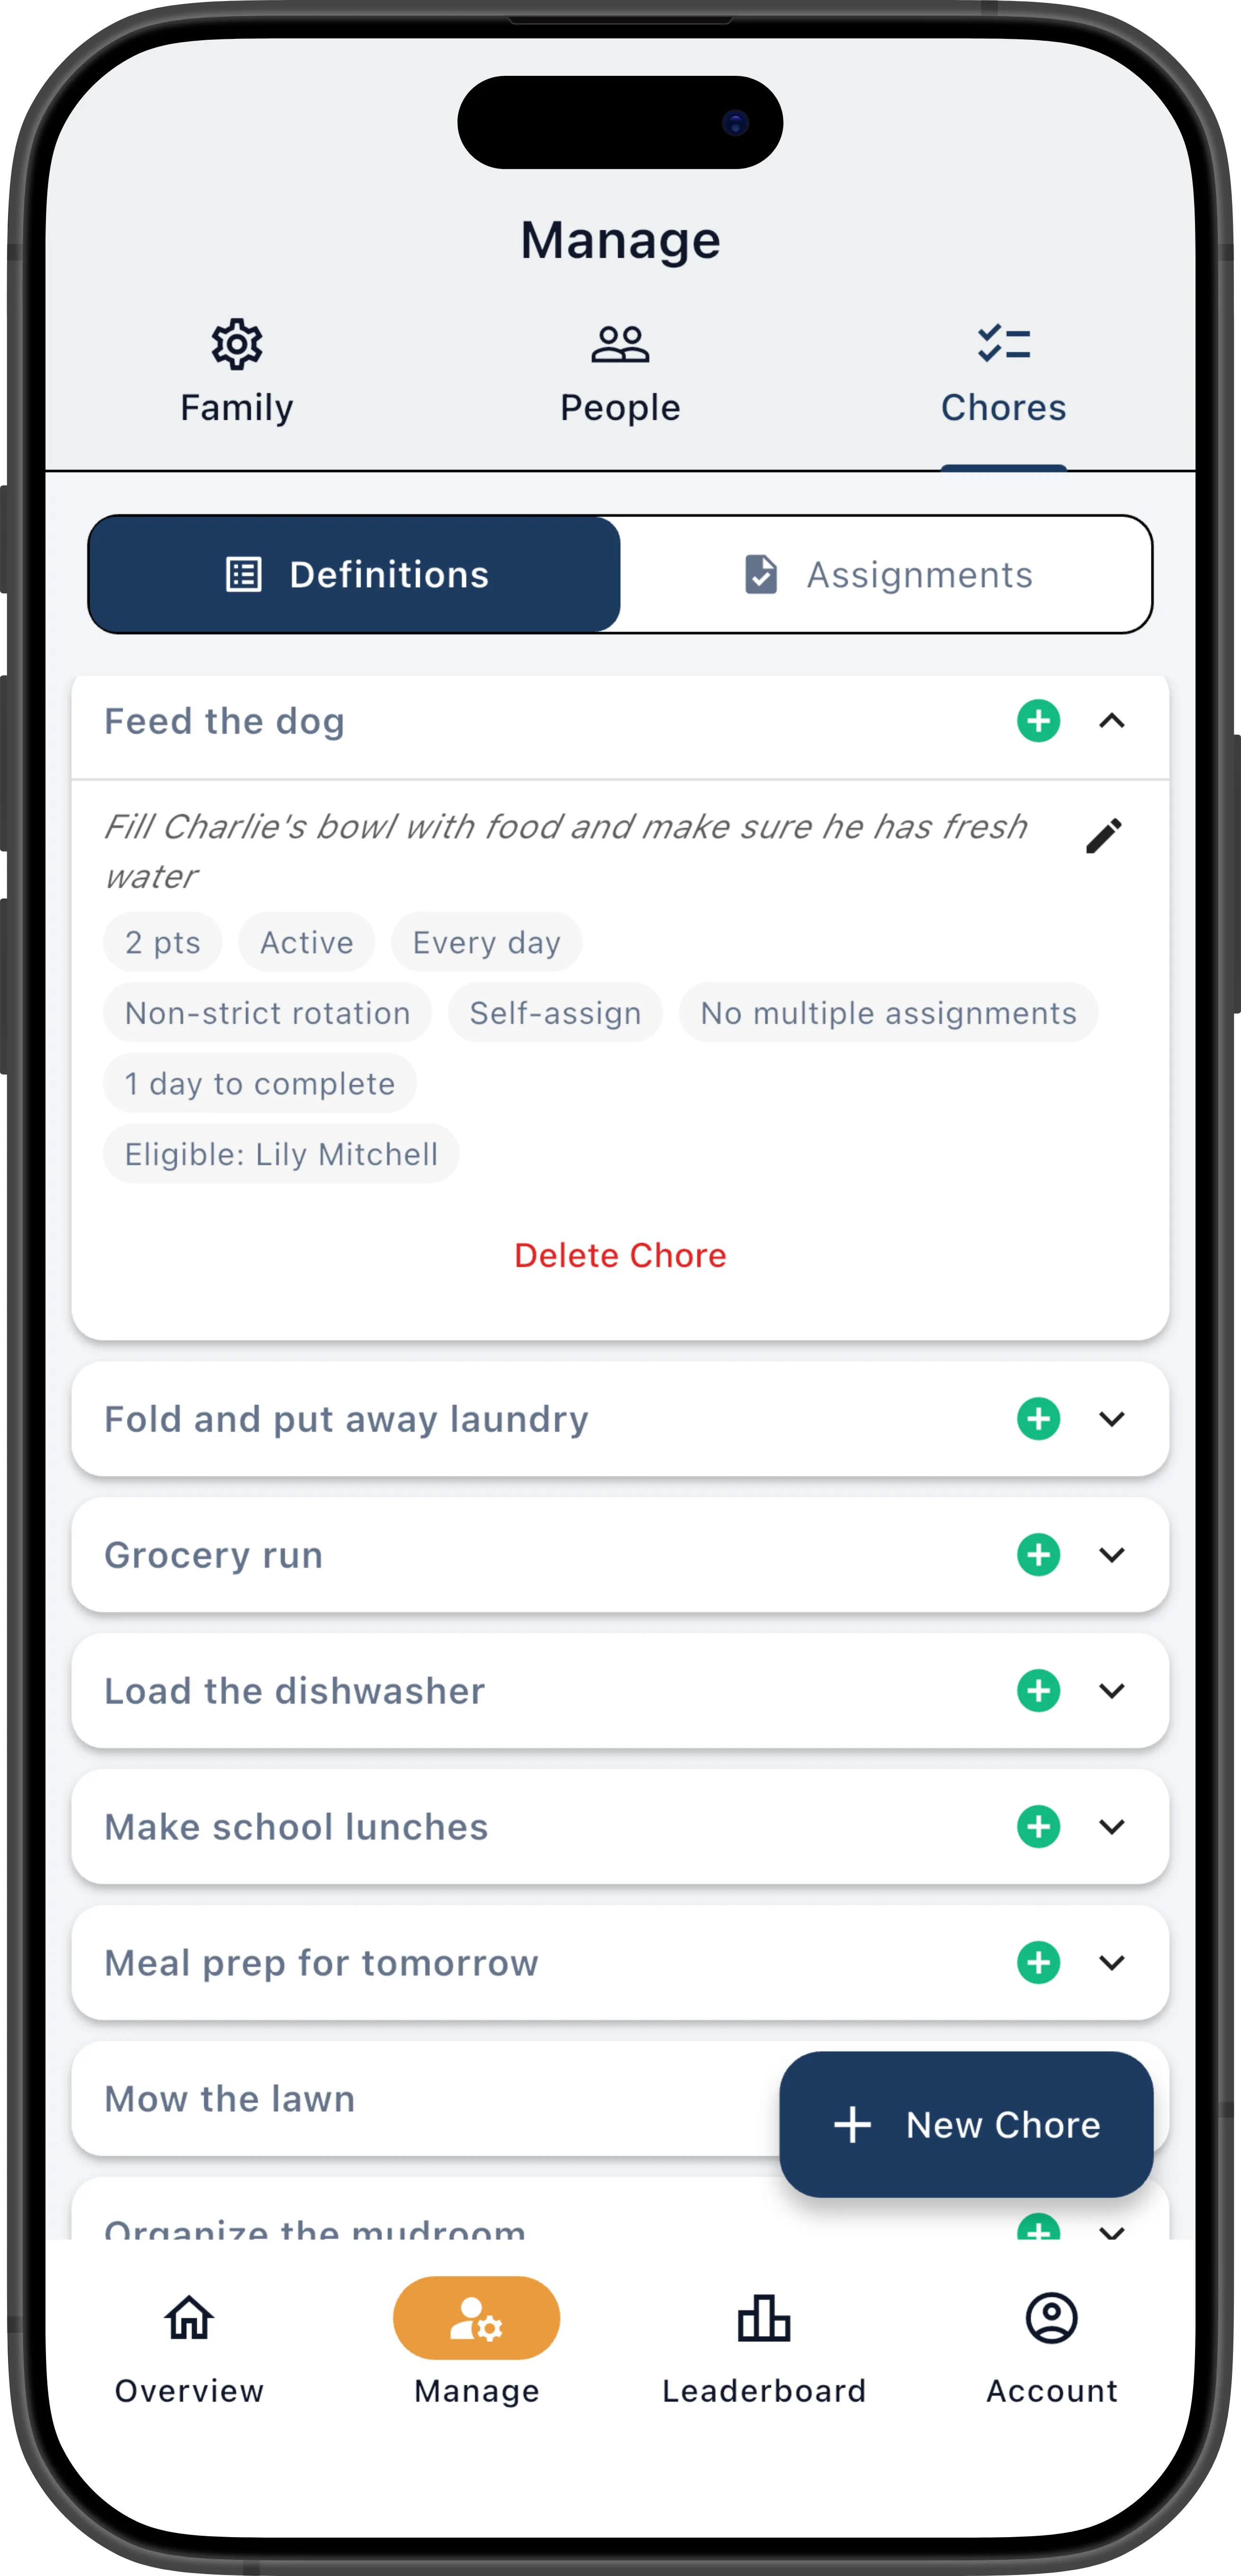
Section titled “The Chores Screen”Navigate to Chores from the main navigation. Use the segmented control at the top to switch between:
- Definitions — All chore templates. Create, edit, or delete chores here.
- Assignments — Individual assigned tasks. Filter by date or view completions.

Tap any chore in the list to expand it and see its full details — schedule, effort points, assignment settings, and eligibility.
Create a Chore Manually
Section titled “Create a Chore Manually”- On the Definitions tab, tap + (Add Chore).
- Fill in the chore title (required, max 200 characters) and optionally a description with instructions or details (max 1,000 characters).
- Set the effort points (0–10) to reflect how difficult or time-consuming the chore is.
- Choose a schedule mode — Interval for repeating chores (daily, weekly, etc.) or Ad-hoc for specific dates.
- Configure the completion and expiration settings — time to complete, auto-expire, strict rotation, self-assign, and whether multiple assignments can exist at once.
- Choose eligible members — all members by default, or select specific people.
- Tap Create Chore.
For a full walkthrough of every field and setting on this screen, see Assigning Your First Chore. For a deeper explanation of scheduling concepts, see Schedule Modes.
Add Chores from the Library
Section titled “Add Chores from the Library”Instead of building every chore from scratch, use the Chore Library to add pre-built templates with one tap.
Import Chores from Excel
Section titled “Import Chores from Excel”To add many chores at once, use Bulk Import to upload an Excel spreadsheet.
Edit a Chore
Section titled “Edit a Chore”- On the Definitions tab, tap the chore to expand it.
- Tap Edit to open the chore editor.
- Modify any fields — title, description, effort points, schedule mode, frequency, assignment settings, eligible members, or any of the toggles.
- Tap Save.
Changes to a definition affect future scheduled assignments only. Already-generated assignments keep their original settings — if you change a chore from 5 points to 3 points, pending assignments still show 5 points. Use point overrides on individual assignments if you need to adjust existing ones.
This means you can safely tweak a chore’s schedule or settings without disrupting anything already on a member’s dashboard.
Deactivate a Chore
Section titled “Deactivate a Chore”If you want to stop a chore from being scheduled without losing its history, you can deactivate it rather than deleting it.
- On the Definitions tab, tap the chore to expand it.
- Tap Edit to open the chore editor.
- Toggle Is Active off and save.
(The Is Active toggle only appears when editing an existing chore — new chores are always created as active, since there’s no reason to define a chore you don’t want scheduled yet.)
When inactive, no new assignments are generated and the chore won’t appear in rotation, Quick Assign, or self-assign lists. However, the chore definition and all past assignment history are preserved. This is ideal for seasonal chores — deactivate “Rake leaves” in spring and reactivate it in fall — or for chores you want to temporarily shelve while you figure out the right schedule.
Toggle Is Active back on at any time to resume scheduling.
Delete a Chore
Section titled “Delete a Chore”- On the Definitions tab, tap the chore.
- Scroll to the bottom and tap Delete.
- Confirm the deletion.
Deleting a definition permanently removes it along with all associated assignments, including any that are currently pending.
View and Manage Assignments
Section titled “View and Manage Assignments”Switch to the Assignments tab to see individual assigned tasks. While the Definitions tab manages what chores exist and how they’re scheduled, the Assignments tab shows every concrete instance — who’s assigned, when it’s due, and what status it’s in.
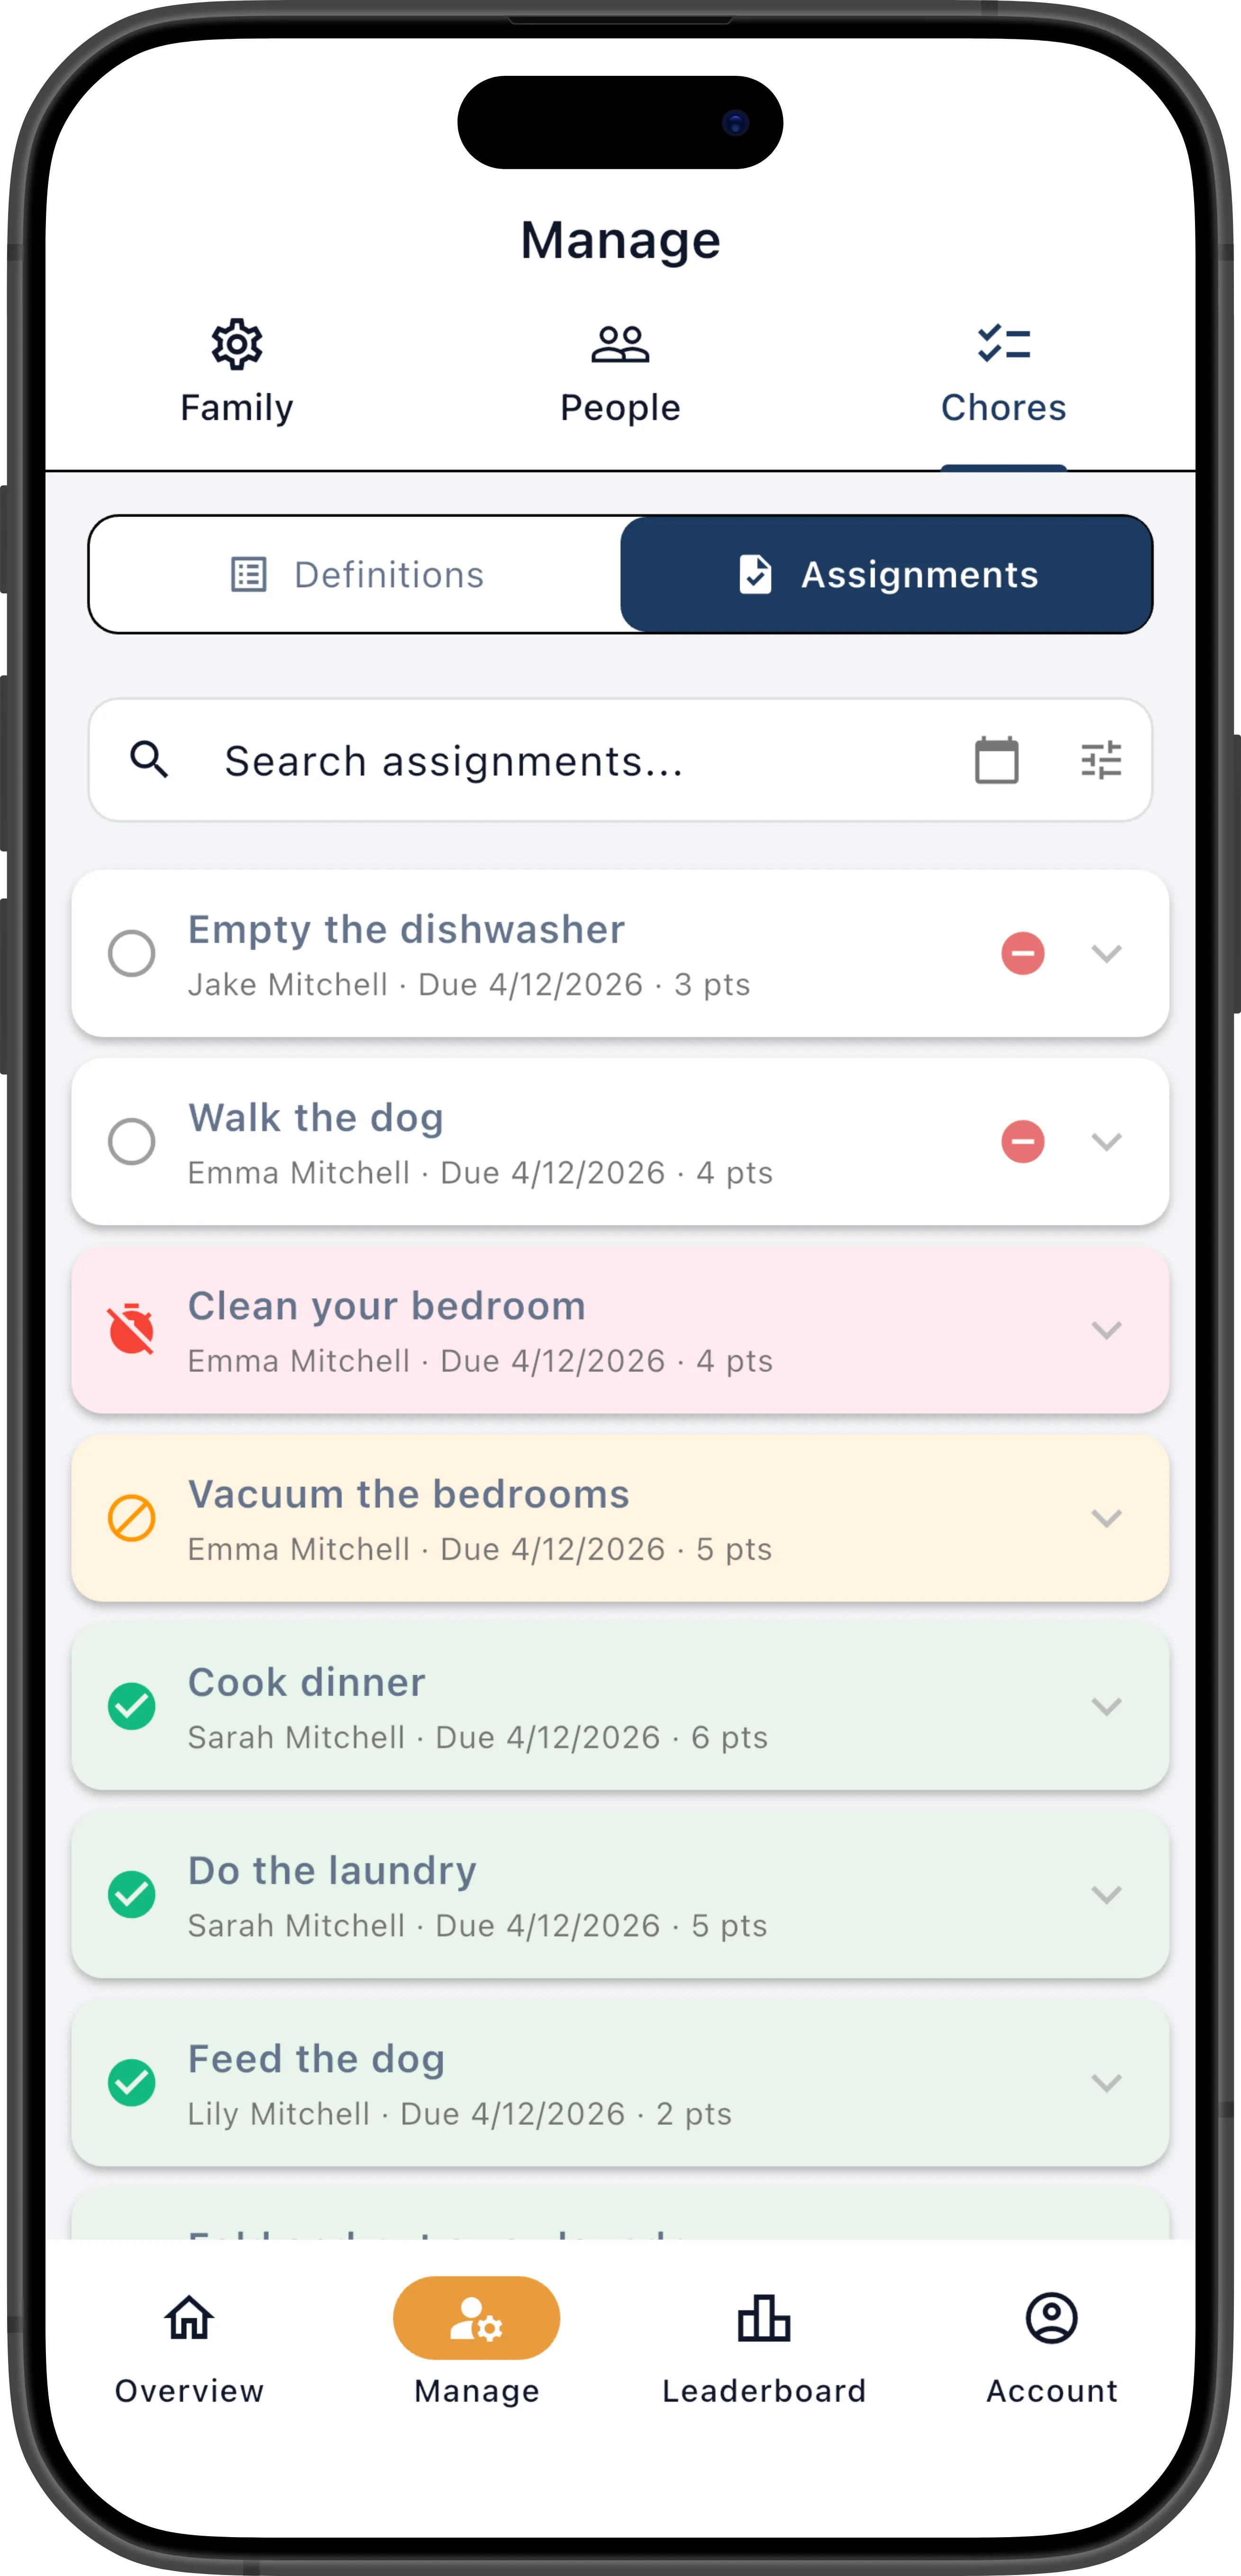
- Filter by date to see what’s due on a specific day — useful for reviewing tomorrow’s schedule or checking last week’s completions.
- Search by chore name or member name to find a specific assignment.
- Filter by status — focus on pending, completed, expired, or excused assignments.
- Tap an assignment to expand it and see its full details.
- Pull down to refresh the list.
Assignment Actions
Section titled “Assignment Actions”Tap an assignment to expand it. From there you can edit every aspect of the assignment:
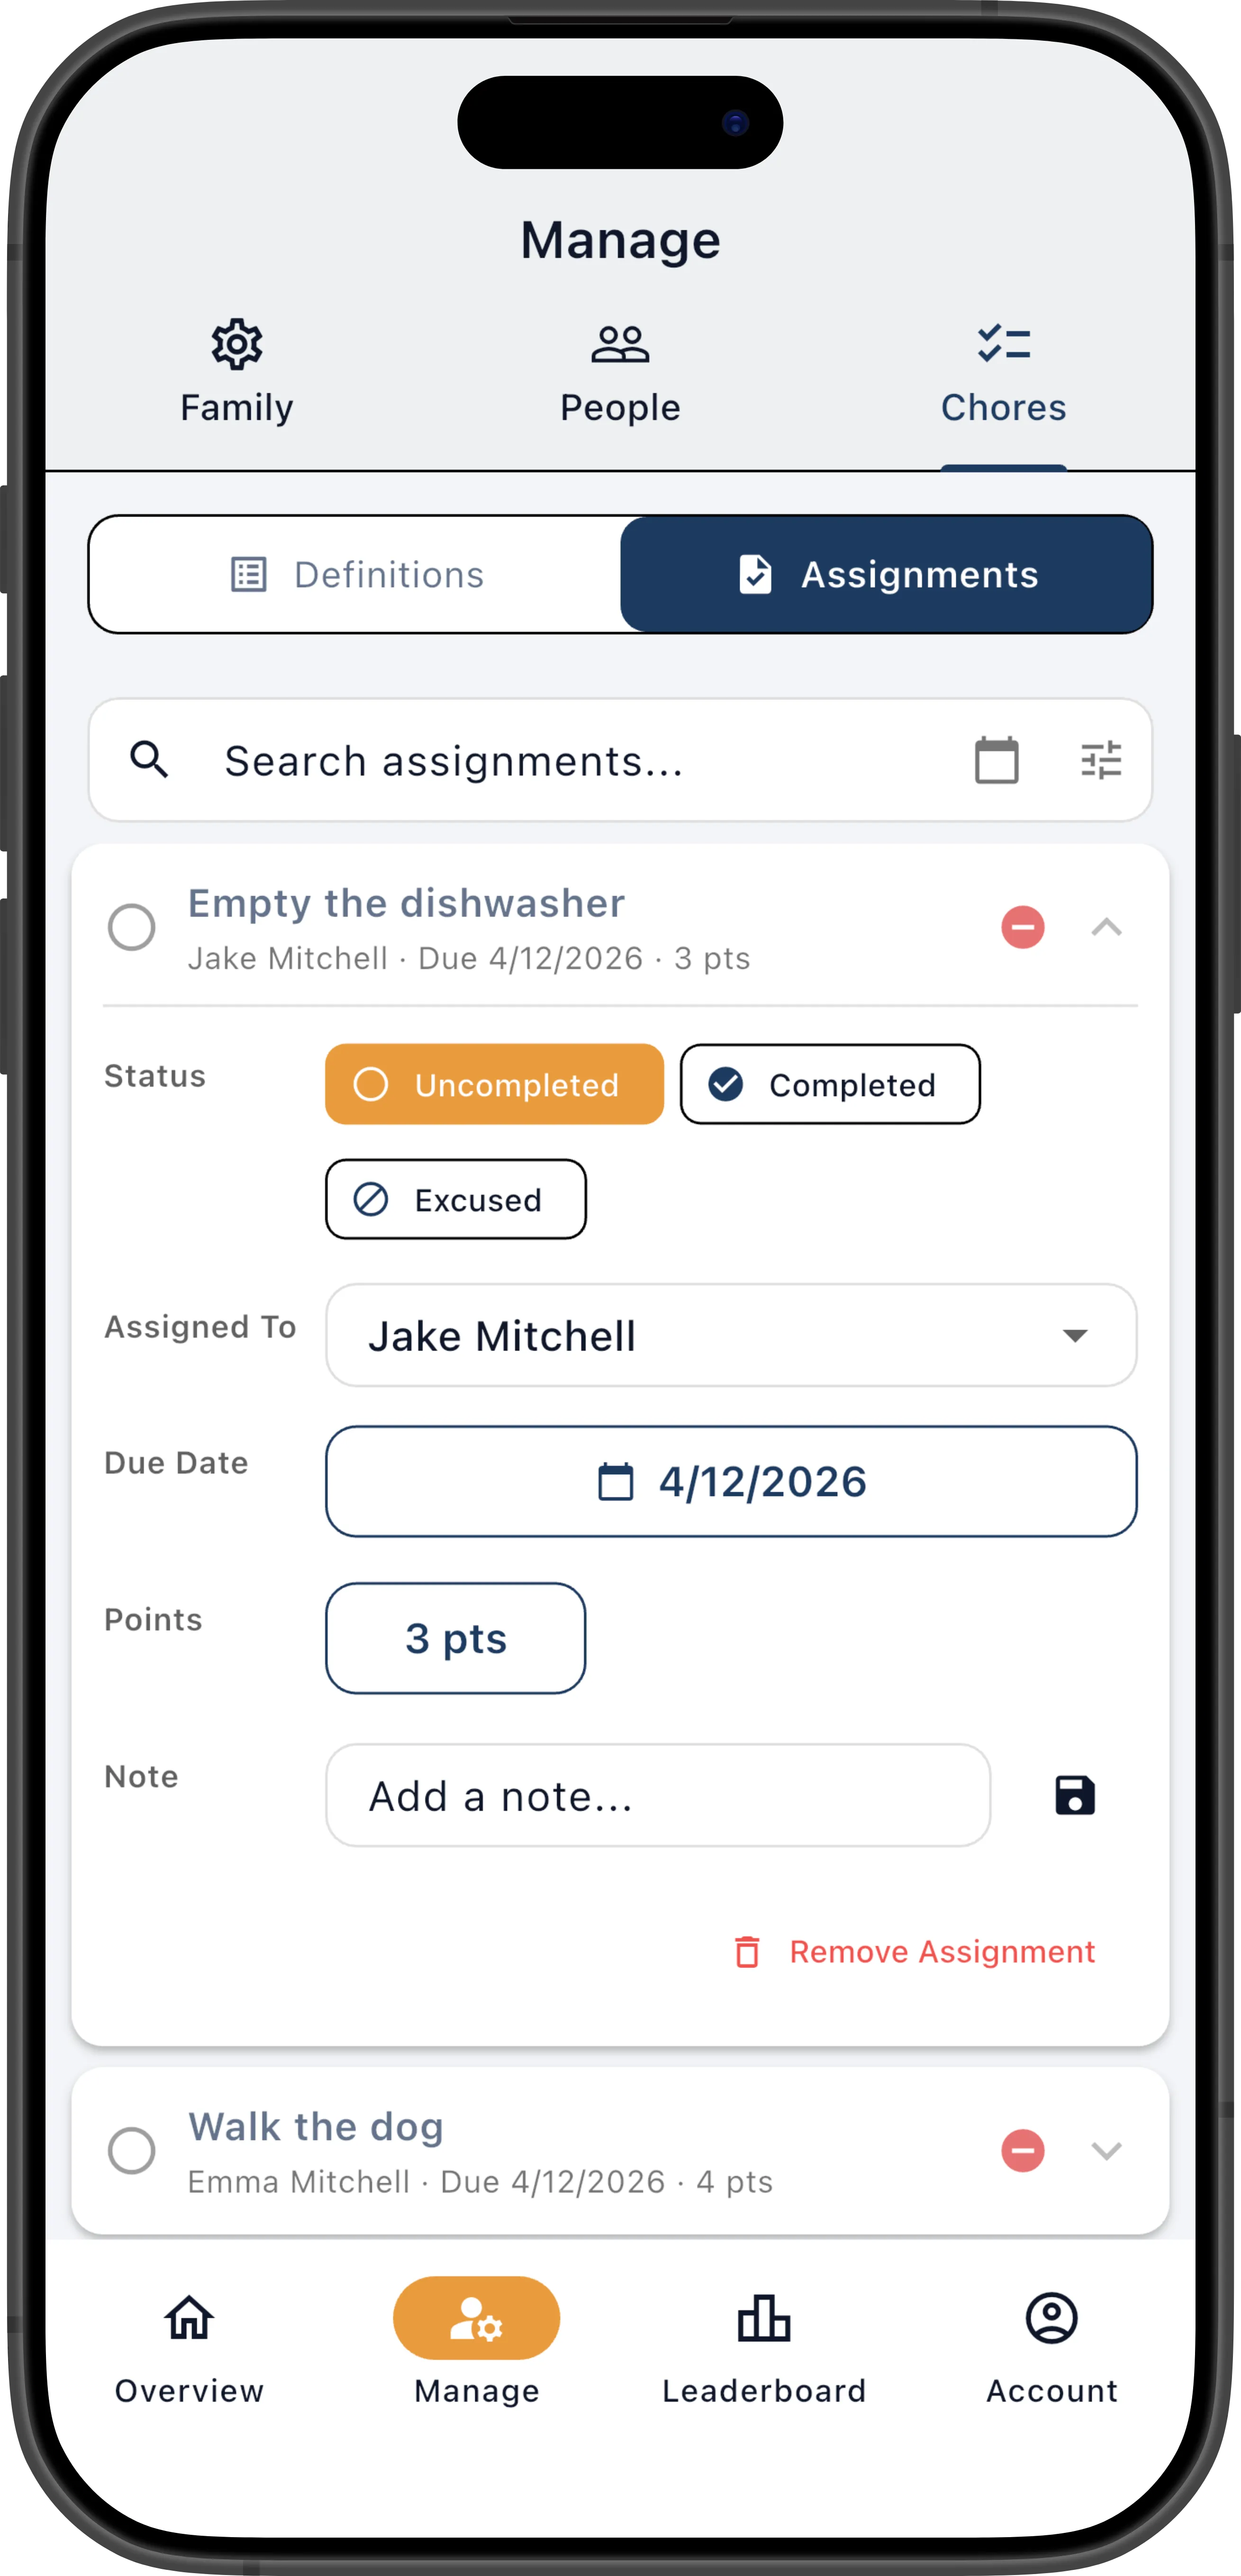
The expanded card provides inline editing for:
- Override points — Set a custom point value for this specific assignment, overriding the definition’s default. Tap the points button to enter a new value. When overridden, the default value is shown in grey next to the override. Tap the X to clear the override and revert to the definition’s default. Overridden points are used for goal tracking and the leaderboard. This is useful for rewarding extra effort (“You cleaned the entire kitchen, not just the dishes — bumping from 5 to 8 points”) or adjusting for partial completion.
- Edit notes — Add or update the free-text note on the assignment. There’s a single shared note per assignment — typically the member fills it in when completing the chore (“The vacuum was broken so I swept instead”), and if you uncomplete it, you can update the note to communicate what still needs to be done (“Looks like the corners were missed — please redo”). Notes are visible to both the manager and the assigned member.
- Change due date — Move the assignment to a different date. This is a one-time change and doesn’t affect the definition’s schedule or future assignments.
- Change completed date — For completed assignments, correct the date the chore was marked done (e.g., if it was completed yesterday but marked today).
- Reassign — Assign the chore to a different eligible member. Eligibility restrictions still apply.
- Unassign — Remove the member assignment, leaving the chore unassigned. Useful if you want someone else to self-assign it.
- Excuse / Unexpcuse — Forgive a chore the member didn’t need to do (e.g., dinner wasn’t needed because you ordered pizza). Excused chores preserve the member’s streak.
- Expire / Reopen — Mark a past-due chore as expired, or reopen an expired one back to pending. Expired chores break streaks.
- Mark complete — Complete the chore on behalf of a member. If it’s past due, it’s recorded as completed late.
- Completion photos — Upload, view (swipeable gallery), or delete photos attached to the assignment.
Chore Assignment Statuses
Section titled “Chore Assignment Statuses”Every chore assignment has one of five statuses:
| Status | Meaning | Streak effect |
|---|---|---|
| Pending | Assigned and waiting to be done | — |
| Completed | Finished on or before the due date | Continues streak |
| Completed Late | Finished after the due date | Breaks streak |
| Excused | Manager forgave the chore — it didn’t need to happen | Continues streak |
| Expired | Past due and no longer actionable — auto-expired or manually expired by a manager | Breaks streak |
Completed vs. Completed Late
Section titled “Completed vs. Completed Late”When a member marks a chore done on or before its due date, the status is completed. If they mark it done after the due date, it’s recorded as completed late. Both count toward goals and the leaderboard, but only on-time completions continue the member’s streak.
Excusing Chores
Section titled “Excusing Chores”Sometimes a chore just doesn’t need to happen — dinner wasn’t cooked because you ordered pizza, or an outdoor chore was rained out. Rather than leaving it overdue, you can excuse it.
On the Today’s Chores screen, tap an overdue chore to reveal the Excuse button. Excused chores move to the Past section. Only managers can excuse chores.
Excused chores:
- Do not count toward goals or points
- Do continue the member’s streak (the chore is forgiven, not failed)
- Are excluded from morning and evening digest notifications
Expiring Chores
Section titled “Expiring Chores”Expired chores are past-due assignments that are no longer actionable. A chore can expire in two ways:
Auto-Expire: Enable Auto-expire when overdue on a chore definition and set a grace period (0–30 days). The chore is automatically set to expired once the grace period elapses after the due date:
- 0 days — expires immediately (the day after the due date). Use for time-sensitive chores like “Cook dinner” or “Set the dinner table” that no longer make sense once the moment has passed.
- 1 day (default) — gives the member one extra day to complete it before it expires.
- N days — allows up to N days past due before expiration.
To enable: edit the chore definition, toggle Auto-expire when overdue on, and set the number of days.
Family-level expiration: The family setting Expire uncompleted chores after due date marks any overdue assignment as expired across the family. The per-definition Auto-expire when overdue setting takes precedence when both are enabled.
Manual expire: Managers can also manually expire an assignment from the assignment actions.
Expired chores:
- Do not count toward goals or points
- Do break the member’s streak (the chore was not done)
- Are excluded from morning and evening digest notifications
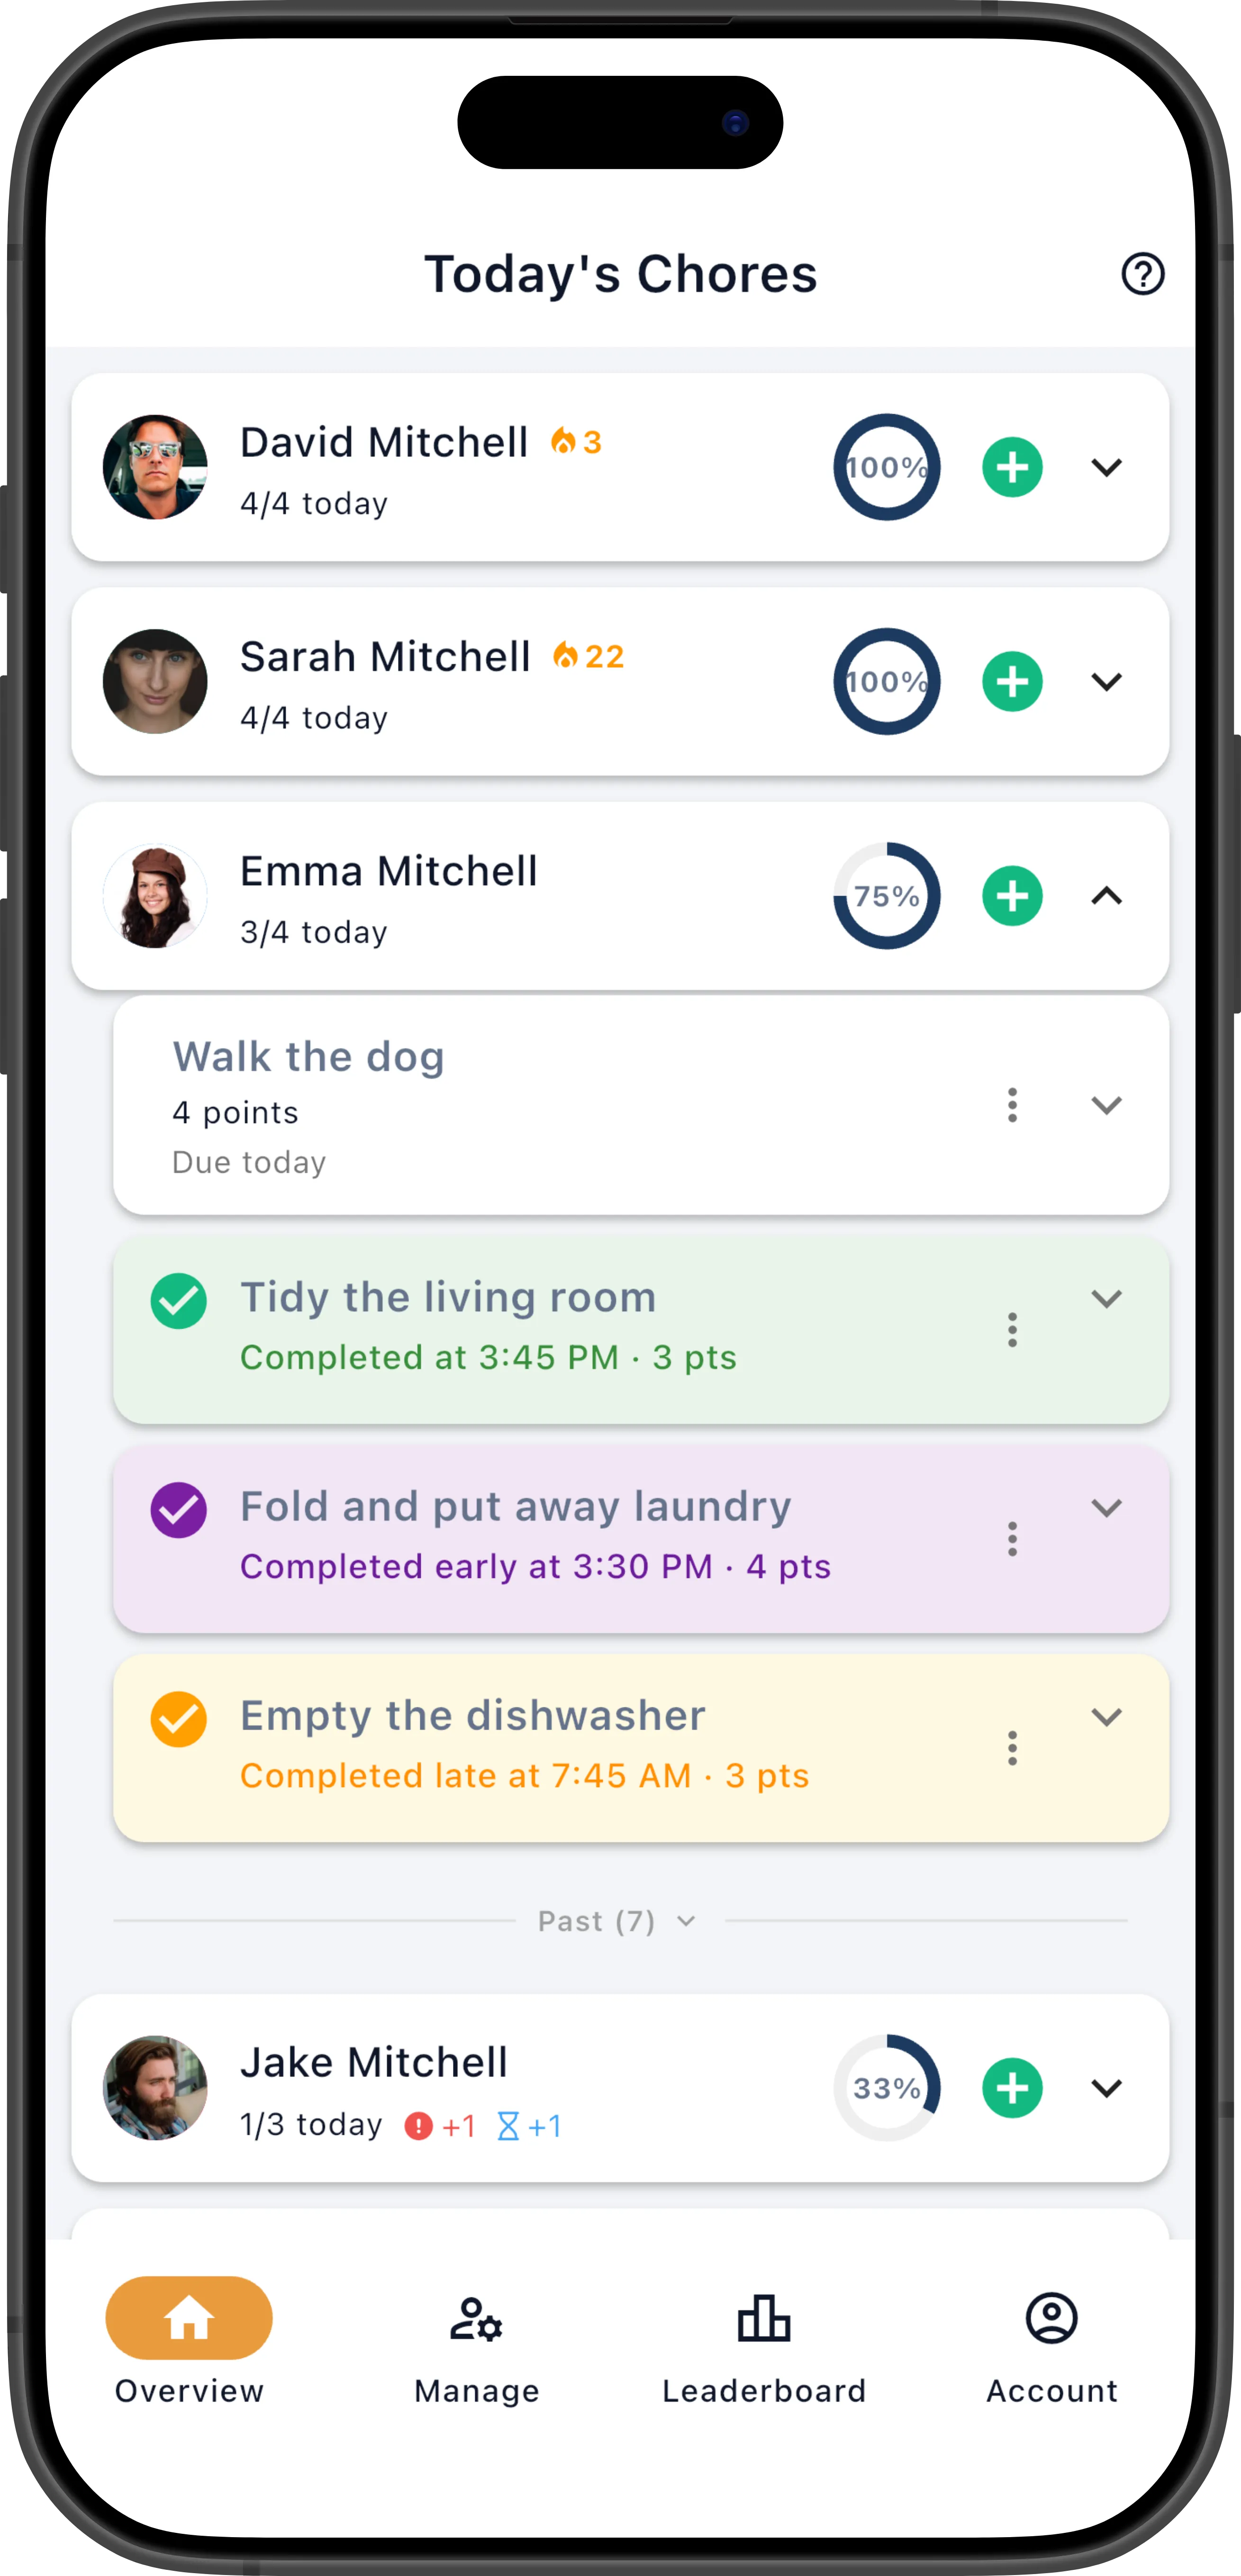
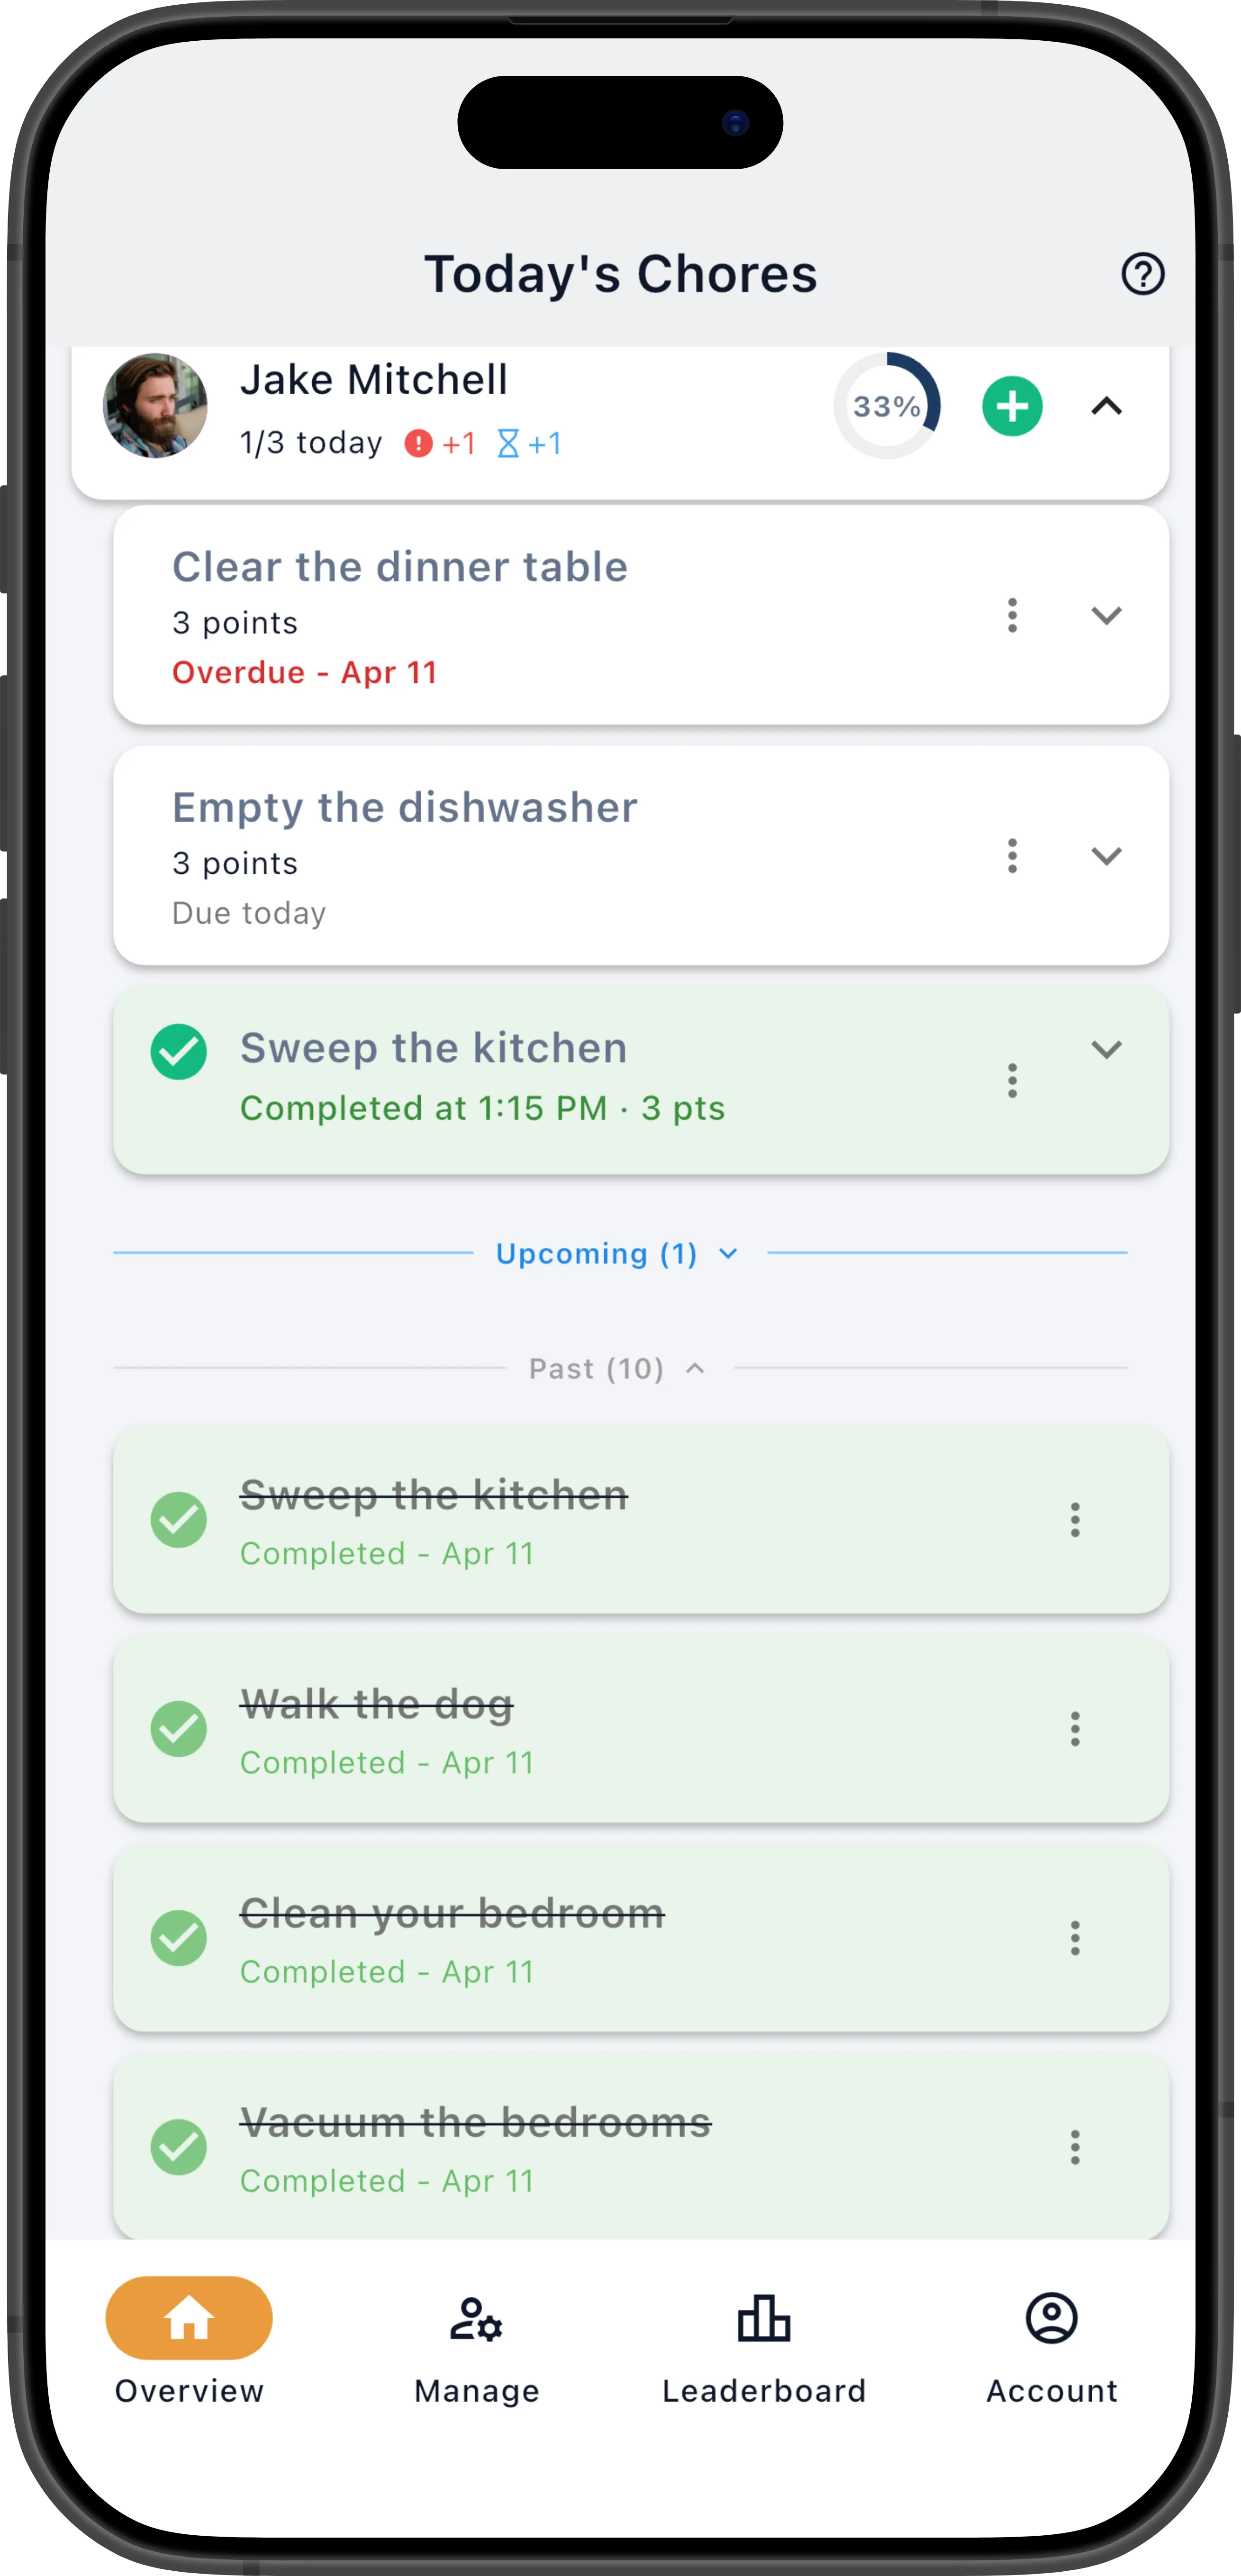
The Past Section
Section titled “The Past Section”Completed, excused, and expired chores from the previous 3 days appear in a collapsed Past section at the bottom of each member’s daily task list. Tap the Past (N) divider to expand it.
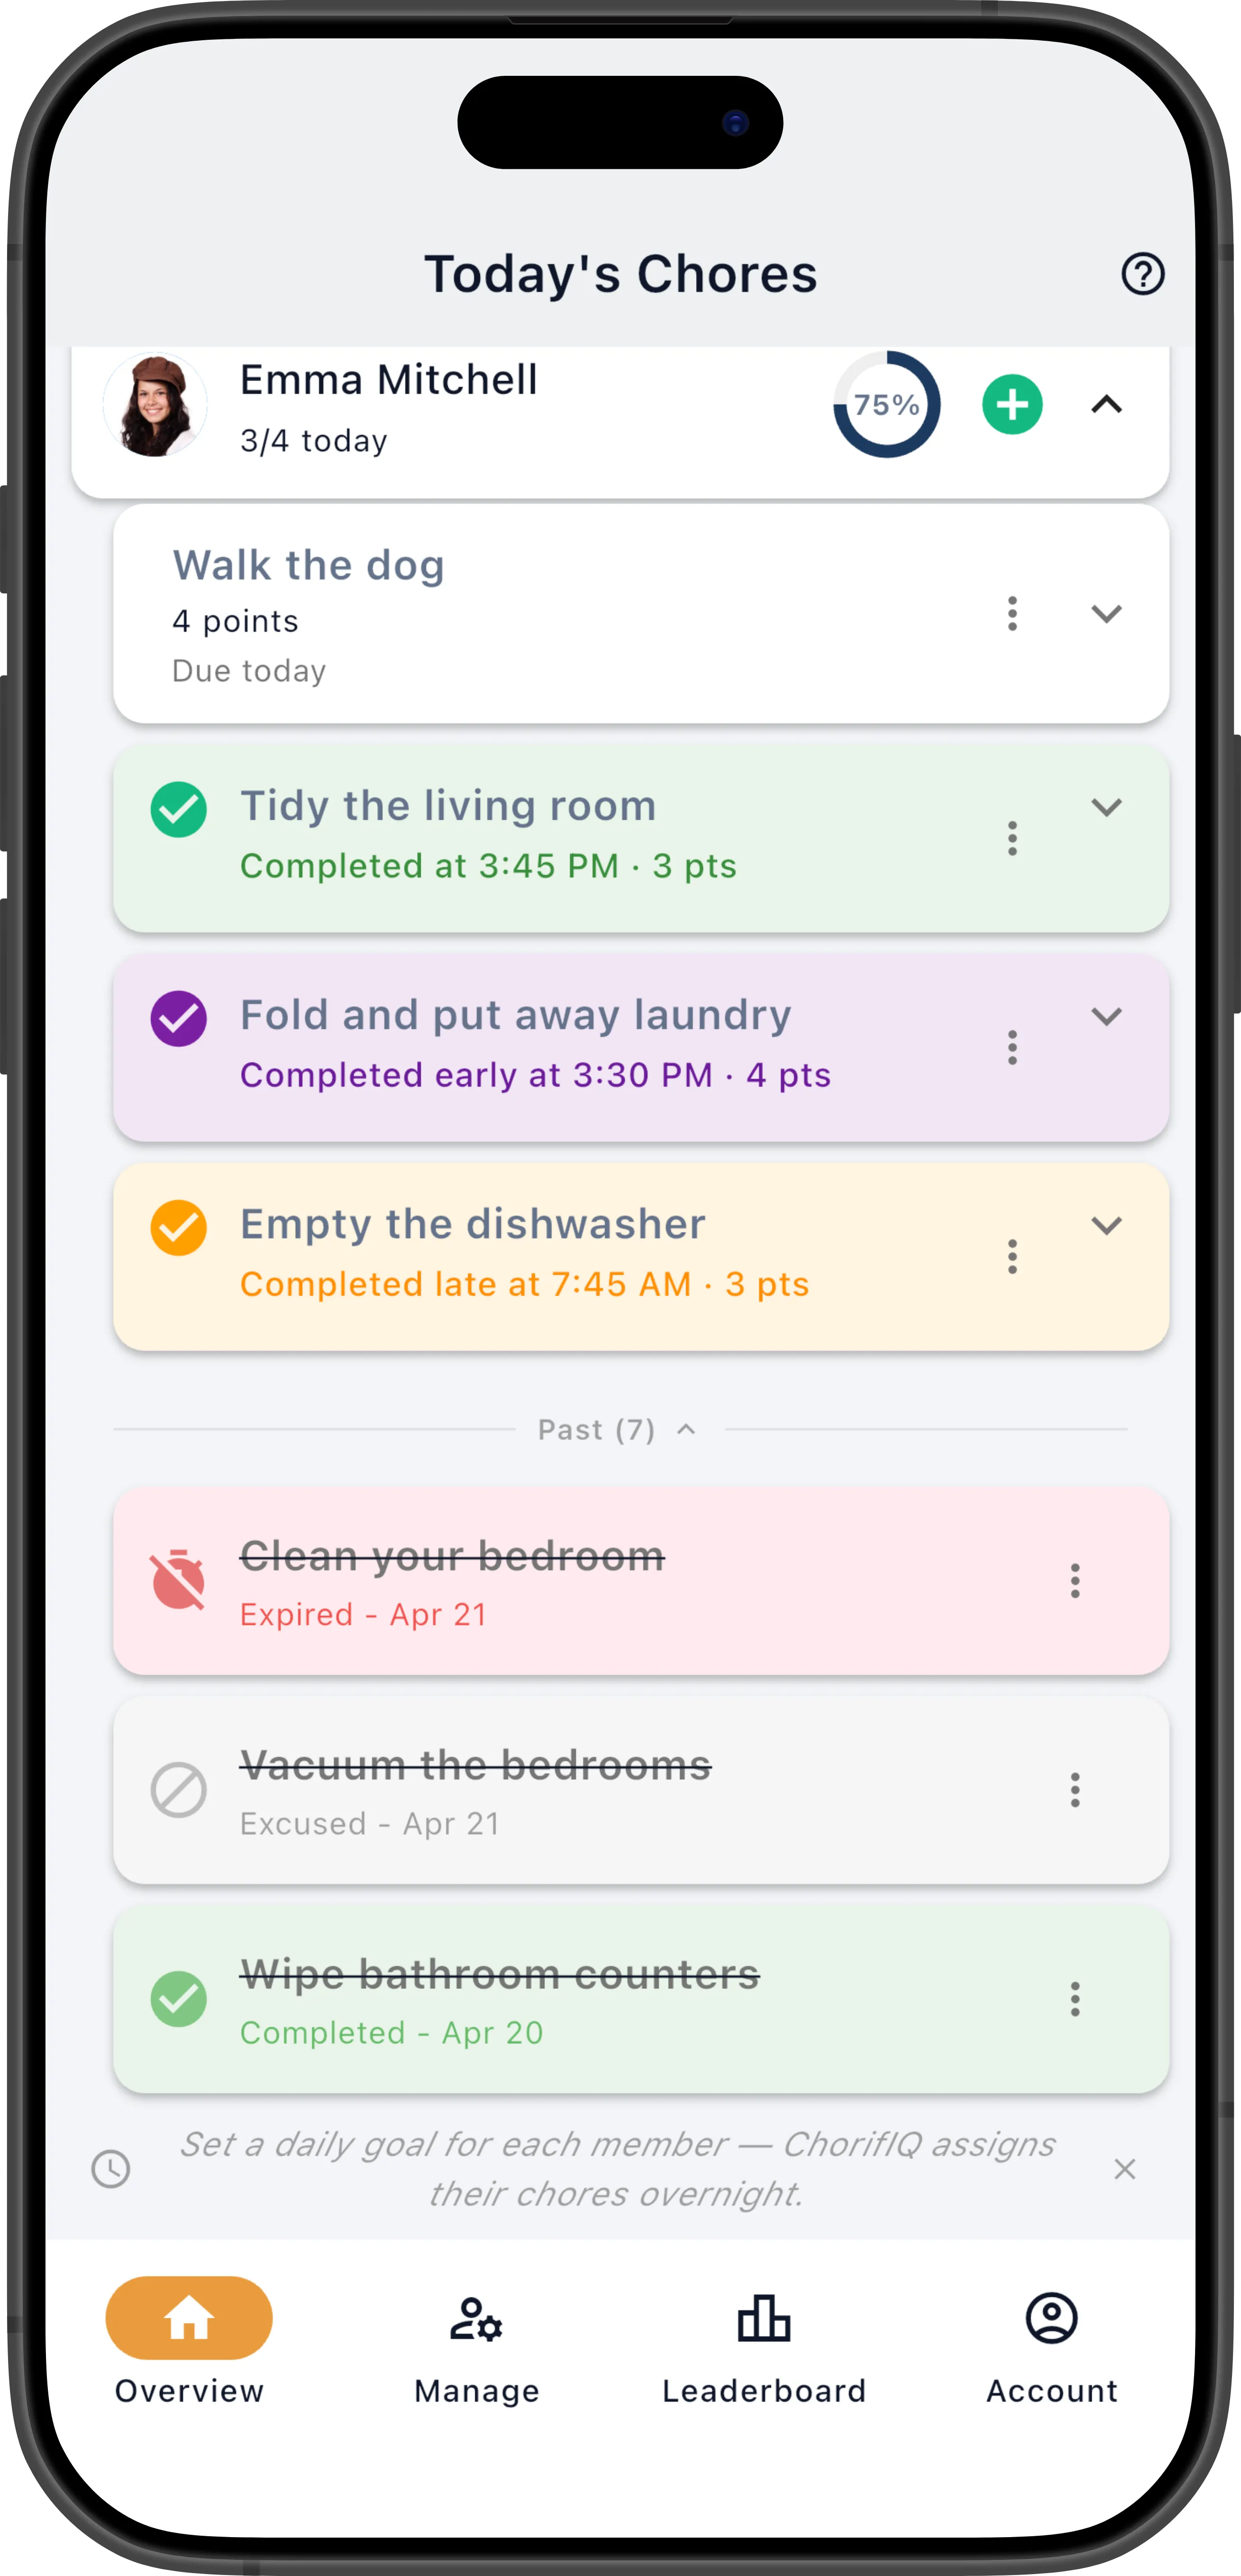
Each entry shows the chore name, due date, and status with a color-coded card:
- Completed (green) — finished on or before the due date
- Completed Late (orange) — finished after the due date
- Excused (grey) — forgiven by a manager
- Expired (red) — past due and no longer actionable
Tap the undo button on excused or expired items to restore them to pending. If a chore was excused or expired by mistake, this is the quickest way to fix it.
To view chore history older than 3 days, go to Manage → Chores → Assignments.
Export Chores
Section titled “Export Chores”To export all chore definitions to a spreadsheet, tap the export icon on the Definitions tab. The file can be opened in Excel, Numbers, or Google Sheets and used as a template for Bulk Import.